It’s Monday of Adobe MAX 2019 so that must mean new and cool stuff for the Adobe video tools. After a quiet IBC where Adobe’s focus was less on new features and more on performance, Adobe MAX brings us a new release of Premiere Pro that delivers Auto Reframe as well as a few other enhancements which should hit your Creative Cloud app today. If you remember Auto Reframe was previewed recently and a technology that uses Adobe Sensei to “intelligently” crop and reframe your video when you move from one aspect ratio (think a 16×9 sequence) to another (like a 1×1). It will be a time saver. But that’s not my favorite thing.
What’s my #1 favorite of this release?
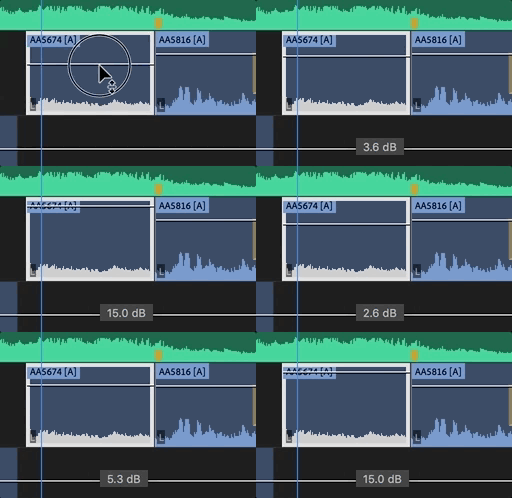
Expanded Audio Gain to +15

I know this might seem like a small thing compared to Auto Reframe but it’ll be very useful to have the extra volume headroom when it comes to mixing audio. That means less back and forth with audio gain in order to get a clip just right.

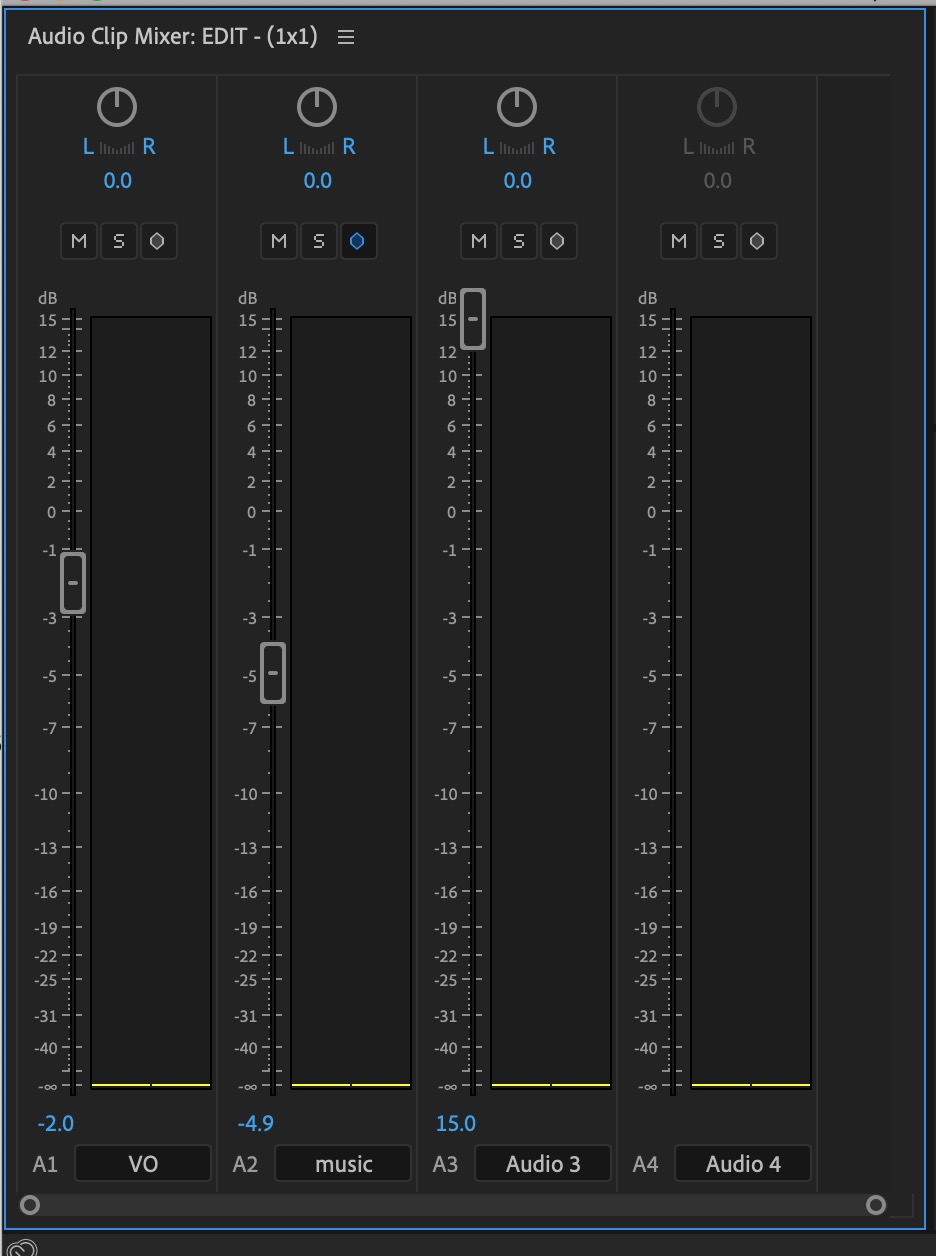
A check of the Clip Mixer sees the faders now go up to 15. The Track Mixer does the same thing.
Auto Reframe
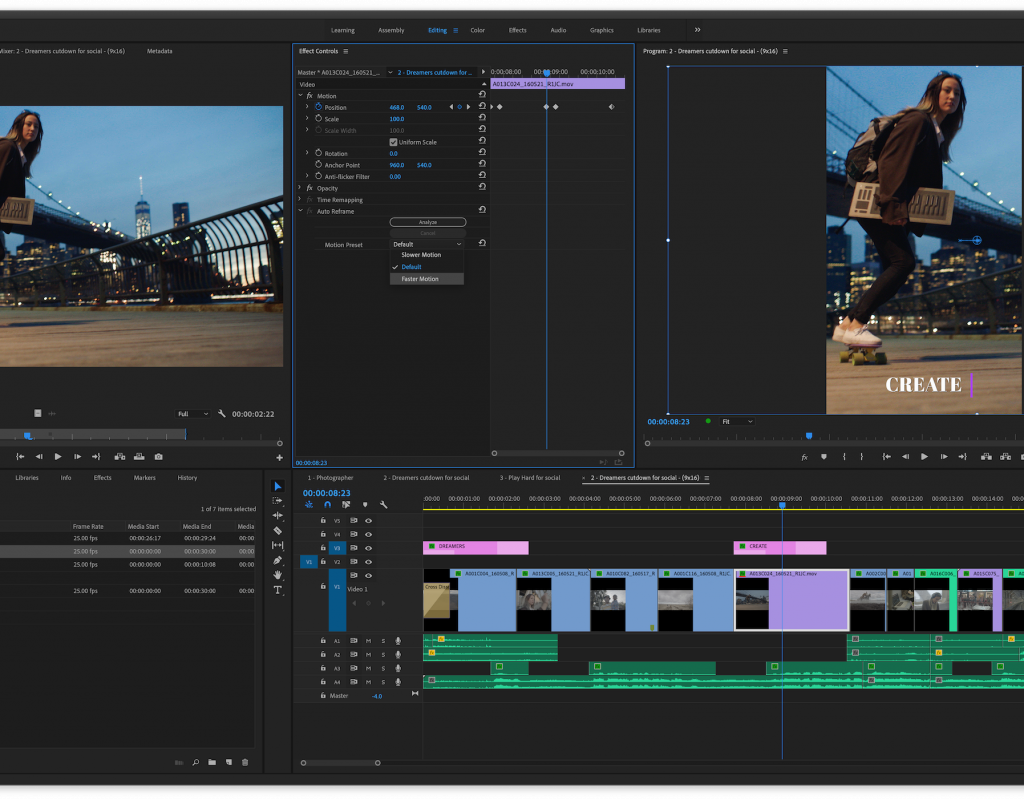
Undoubtedly Auto Reframe is the signature feature of this release. It’s a tool many of us have wished for in the editing suite for a number of years since social media reformats became a thing and it will be a big timesaver. Will it be perfect in every situation? Absolutely not but when the AI doesn’t nail the framing it’ll at least be a good start. Plus you can always remove the effect and do it on your own.
Right + click on a sequence and choose the new Auto Reframe Sequence… option.
The Nest clip vs Don’t nest clips is important to understand. If you have already applied a lot of motion changes such as scaling and keyframing of some clip moves you’d want to choose the Nest clip option, otherwise Auto Reframe will remove some motion effects. If you choose to Nest all of the clips in the sequence will be nested and the Auto Reframe applied to the nest.
In order to keep the subject in frame Auto Reframe automatically generates Motion Position keyframes so a big sequence with a lot of complex shots will both take time to analyze as well as create a lot of keyframe data. It doesn’t seem to balloon the project size too badly though so that’s a good thing. You can create custom sizes which might come in handy if you’re doing edits for oddly shaped screens in an arena or concert environment.
All new Auto Reframe sequences get placed in their own Auto Reframed Sequence bin. Yes, a custom 2×11 sequence was a bit extreme but Auto Reframe did a commendable job of trying to keep things in frame with such an extreme aspect ratio.
Media Cache changes
A new option to Delete all media cache files from the system is one that could come in very handy if your system drive is starting to fill up since that’s where PPro defaults the media cache to. The new option for delete all requires a bit of extra attention.
Maybe someday the media cache will get a full overhaul.
ProRes export in an MXF wrapper on both Mac and Windows
A small one for many but big for others if you need to deliver MXF wrapper ProRes files. This is available in both the Premiere Pro export window and Media Encoder.
Time remapping to 20,000 percent
This is a notable change if you do a lot of time remapping because of the previous limit of an often not fast enough 1,000%. Your speed ramps just became even more obnoxious.
A few other features in this release
- Graphics improvements such as better selecting, naming, and re-ordering and new underlining of text.
- Various under-the-hood refinements, including improvements for
- H265, HEVC, and Apple ProRes formats, faster ProRes HDR and better thumbnail caching. A lot of that depends on the speed of your hard drive but overall improvements are welcome.
- More native formats supported such as Canon C500, Canon XF-HEVC, Sony Venice V4 with high frame rate recording.
- Better HDR10 export control and metadata support.
- System Compatibility Report does a better job checking drivers for increased stability.
That’s some pretty good stuff. You can see everything across Adobe’s entire audio and video product line in these videos. It should be noted to never update your installs mid-project. If you never get between projects then do your updating the right way.
After Effects
Real-time playback of cached previews
Get into the creative flow in After Effects and stay there. Improvements to CPU threading and a new GPU architecture for pushing pixels to the screen, means you can interact with the application while previewing in real time. Complex compositions can mean a lot of heavy lifting for your system. The new release of After Effects helps to lighten the load so you can see what you’re doing as you do it. Create more; wait less.
Snappier shape layers
Work more fluidly with shape-heavy compositions, with improved shape behaviours, especially when snapping. Shape grouping and ungrouping is quicker and easier with a new context menu, enabling you to manage multiple shapes at once, right in the timeline.
Faster Content-Aware Fill
Content-Aware Fill for video is now up to twice as fast, thanks to more efficient use of memory. Powered by Adobe Sensei AI technologies, Content-Aware Fill automates the process of removing unwanted objects or visual elements, such as logos, from video footage.
Faster multichannel EXR files
Multichannel EXR files are up to 10-12x faster. Import EXR files as layered compositions: save time on setup and start compositing right away. The new workflow includes native support for Cryptomatte for more power and precision, and there’s even a handy Contact Sheet view to quickly locate specific passes.
More efficient expressions
Expressions run more efficiently in the latest release of After Effects, improving overall performance, especially when working with expressions and Master Properties together.
We’ve added expression access to text style properties, enabling you to change or customize fonts and styling with expressions, and keep multiple layers in sync. Save your expressions as presets and reuse them again and again.
Dropdown menus for Motion Graphics templates
New custom dropdown menus for expressions enable you to control layer properties with easy-to-read menus. Just like the Slider, Checkbox and Color controls, they work in your compositions, with Master Properties, and with Motion Graphics templates, giving both you and your editor colleagues a streamlined graphics editing experience. Combine dropdown menus with text style expressions to control the text formatting on multiple layers in one place.
Updated Cinema 4D
The new release of After Effects includes an updated version of Maxon Cinema 4D Lite (based on Cinema 4D Release 21). Use Cinema 4D Lite to create and import 3D content for After Effects projects. Add Cinema 4D content to After Effects projects just like footage; extract scene data, like cameras or 3D objects, which you can manipulate in After Effects.
The latest release of C4D Lite can be launched within After Effects and as a standalone application. New features include the Caps and Bevel tools for creating extruded text and splines with more personality. A new high-performance denoising filter improves visual quality and reduces rendering times.
Format and System Support
After Effects offers new native support for Canon XF-HEVC, as well as import support for two legacy formats: Animation with delta frames and MJPEG. Plus, we’ve improved performance for 10-bit H.265 HD/UHD, HEVC HD/UHD and Apple ProRes formats.
After Effects will now detect and alert you to any known issues with specific hardware or drivers being used on your computer to ensure compatibility and optimum performance.
Character Animator
Scene cameras
Add narrative dynamics with new scene cameras. Set up shots within your scenes, like wide, close-up, and zoom and create camera moves between them. Cut between two characters in a scene or smoothly pan back and forth as they interact. Create triggers for your scene cameras for added efficiency in production or richer storytelling in your livestreams.
Keyframes
Keyframes add precision and creative control for animating story elements and your characters. Keyframes in Character Animator allow you to position and time a character or background element in the scene, as well as fine-tuning the physics behaviors of interactive elements, such as wind strength and gravity direction. You can also keyframe camera moves across your scenes. Keyframes can be triggered on-the-fly to add impact to live performances!
Keyframes and scene cameras make it much easier for some content creators to go end-to-end using just Photoshop or Illustrator for their artwork and Character Animator to animate for simple, short-form pieces.
Audio triggers
Enliven your scenes by adding triggerable audio, like a character’s signature sound, spoken exclamation, or musical phrase, or trigger audience applause or laugh tracks right on cue. Your characters become more dynamic and your animation workflows become simpler with audio automatically synched to the triggerable animated actions or performance timing. Use or record your own audio elements, or choose clips from the free Audition Sound Effects library.
Motion lines
Use motion lines as secondary animations to communicate movement. Simply add the behavior to a handle in your character’s rigging, then adjust its parameters, to trail the character’s motion with colored lines of varying width, opacity, lifespan, and other attributes, emphasizing motion, illustrating speed and trajectory.
Audition
Reengineered audio effects routing streamlines multichannel audio workflows, including custom channelization with adaptive tracks. Add audio effects with their native channelization options and set up routing to the output configurations you require.
This new functionality, available in both Audition and Premiere Pro, provides support for third-party audio effects to be queried for their channelization options, and route specific audio clip and track channels in and out of those effects.
For broadcast editors, this means you can add as many instances of the Loudness Radar meter as needed to monitor loudness on different segments of a multichannel deliverable to get individual, accurate measurements of each stream and ensure compliance with regulations in your region.
For immersive producers building rich, wrap-around soundscapes using plug-ins like Facebook 360, easily route your mono, multichannel, or Ambisonics recordings to the suite of effects for accurate sound placement in a 3D environment.
Audio clip stacking
Audition now allows you to set your audio clip stacking preference. Audio clips can use the video timeline paradigm, where whatever is on top of the stack is what you hear. Alternatively, users can select the traditional Audition behavior, where clips stacked in the same track play together. Stacking audio clips allows for a minimalist approach to track count and can help achieve precise timing for signature sounds or arrangements. Audio clip stacking is now back as a session-level preference.
Rush
The ability to share directly to TikTok.


