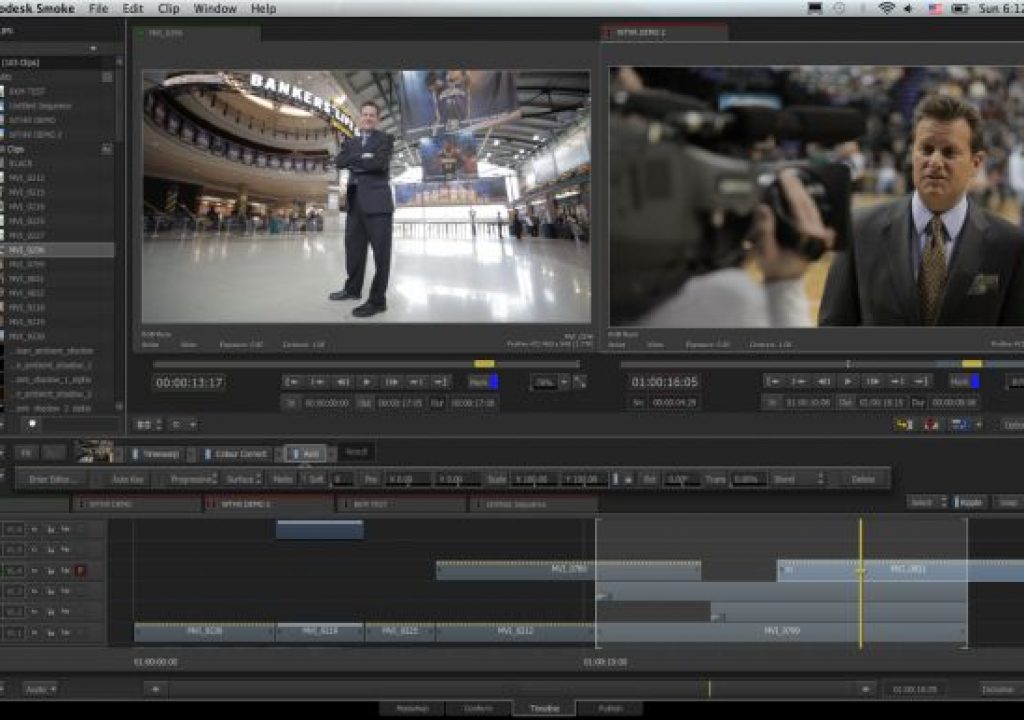
NAB 2012 just ended but it feels like a lifetime ago. I had the pleasure of being one of the Smoke Experts demonstrating the New Smoke 2013 on Mac to the show public. I talked to people from Utah to Singapore to India, and content creators from one system editorial boutiques to large universities to multi-system, large scale post facilities. They were all interested in Smoke 2013 and here are the top things I was asked to explain.
1. Show me the editing. Everyone had heard about how the creative editing tools had changed for 2013. The overwhelming majority of editors I talked to were coming from Final Cut Pro 7. There were a few from Avid Media Composer. No one stated they were using Adobe Premiere, but many were using After Effects with FCP. Instantly they saw how the editing interface adopted standards that they were comfortable with. Smoke has a new media list on the side, with folders for clip organization and a traditional NLE bin structure. There is a standard source/record layout and the timeline was track based. Multiple timelines can be accessed via tabs, and the standard trim tools with insert, overwrite, ripple, slip, slide, etc. are all there and usable with hotkeys or UI buttons. Once I showed them what they were used to, I showed them some of the features that sets Smoke apart, like the large thumbnail view where you can see about 30 clips all at once and are able to scrub those clips, mark in/outs, and drag selections to your timeline.
2. How do I import my media and can I transcode it to Prores? The importing process has been greatly simplified from previous versions of Smoke. It’s basically a simple drag and drop of your media directly in to the media list. But a full range of clip preview and import features exist to allow you to import your media as you wish. The MediaHub is where you can see all of the drives both local and networked to your Mac, and Smoke will display working thumbnails of your import media. You can scrub the media for preview, mark in/outs for selective importing, and see a wide range of metadata information about each clip. You can drag individual clips or entire folders or entire folder trees which maintain their hierarchy. You can even drag and import directly from the Finder in OSX. Normally the media will remain linked and used in its native codec. But you can choose to transcode the media by creating Project Media upon import. Smoke 2013 now has the ability to work with any flavor of Prores as an intermediate codec. With this option selected upon project creation, Smoke will create project media and process effects with the prores codec you choose from LT to 4:4:4:4. This will allow you to keep a prores workflow throughout the edit, or work better with heavier codecs.
3. What’s the color grading like? There are multiple levels of color correcting and grading available in Smoke. One level is the ability to do a basic grade on a clip by clip basis from the timeline. By simply right clicking and adding a Color Effect, you can access the mini tool bar in the timeline for a quick grade.
From there you can jump into the full Color Corrector or the more advanced Colour Warper and start working with multiple secondary color options. Since the Color tools are timeline based, you can use the Triptych view and compare and match colors from three different clips in your sequence. Color effects can also be used on Gaps or blank layers on the timeline where they act like adjustment layers. You can then add masks to these layers and track those masks to objects in your scene. The Avid Artist color panel is supported with Smoke and many people also asked me about the Tangent panels. The Tangent panels are being supported on Autodesk Flame Premium so it maybe an option for Smoke sometime in the future.
4. What effects does it do? This is where it got very interesting. Most of the people I talked to were versed in editing and coloring, and they might have had some experience with After Effects, but they weren’t prepared for what they saw with ConnectFX. You can do a lot of powerful timeline layering effects with AXIS, which has a full Keyer with Masking included in its 3D positional axis controls. But ConnectFX bring the full arsenal of creative tools to the timeline.
A simple right-click and add effect to a clip or multiple clips will bring them into the Node based ConnectFX workspace. Most people are familiar with layer-based compositing like in After Effects. So I had to explain to them how that with a node based system, you aren’t limited to one layer over another, but that with the ConnectFX tools which include Action, you can work in a true 3D compositing environment. This 3D workspace allows for realistic lighting, shadows and 3D object integration along with your 2D clip elements. A node based workflow allows you to use media assets and repurpose them at different points in the pipeline. Moving nodes and effects around to experiment with different looks is as easy as dragging and dropping nodes in between effects in the ConnectFX Schematic. It’s easier to show you… here is a video that explains it.
Node Based Effects in Smoke 2013
Click here for Part 2

