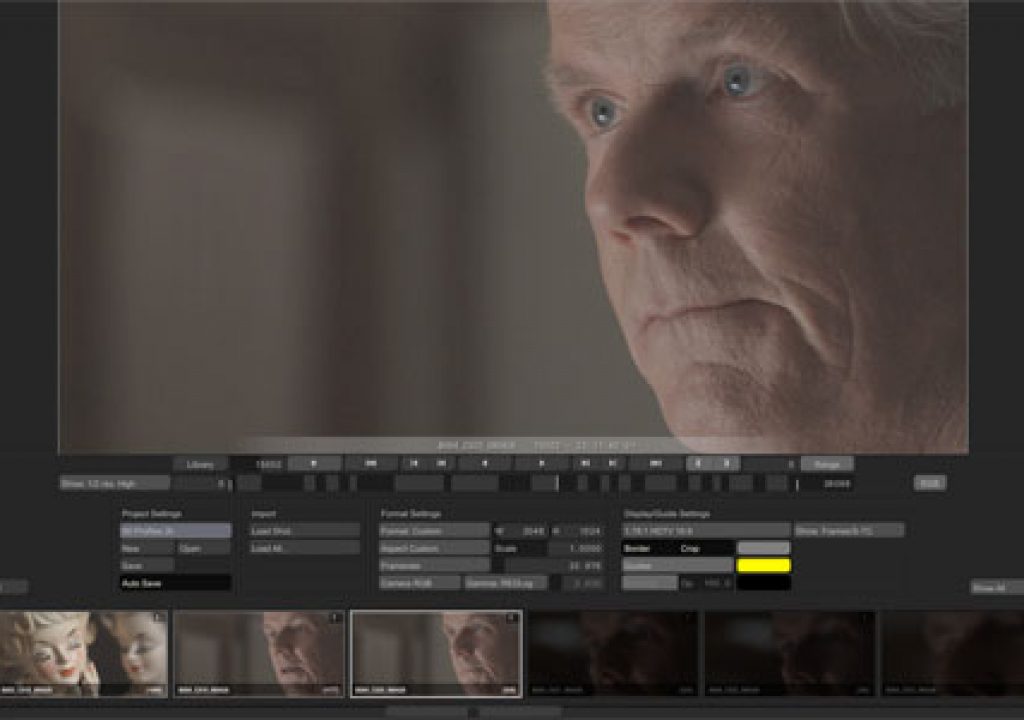
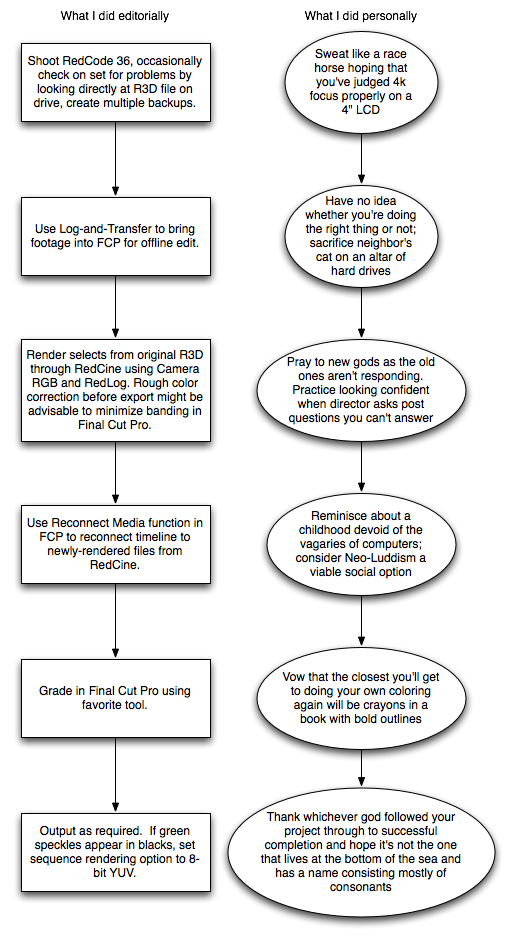
This is by no means a definitive manual on how to post RED footage. Rather, this is how I managed to work with R3D footage while creating a spec spot using the RED. Your mileage may vary. I expect to be flamed repeatedly regarding my handling of this shoot’s post process, but from the ashes I hope to extract some knowledge as to how to do it all better next time.
We did not record any sound on the shoot, so that part of the post process is not addressed. Yay!
For behind-the-scenes action, see Adam Wilt’s post on the shoot itself.
(1) SHOOT. COPY. TEST. REPEAT.
We shot using RedCode 36, which records more data per second than RedCode 24. Either one can be used with the RED drive; only RedCode 24 can be used with the CF card due to the slower write speed.
Adam Wilt acted as DAS (digital acquisition supervisor) during the shoot, and as such he:
-Occasionally checked focus and exposure by pulling the RED drive and checking the R3D files directly on the drive. (This was much faster than copying the files over and then checking them. Files were copied during meal breaks or time-consuming lighting setups.)
-Made multiple copies of the data, both for safety reasons and to ensure that the director and I both walked away with copies of the footage to work with on Firewire drives. Additional copies went different directions as backups.
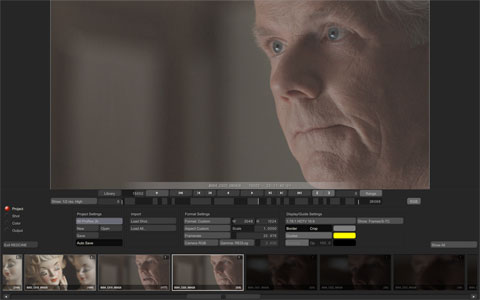
(2) USE THE RED LOG-AND-TRANSFER PLUGIN TO IMPORT FOOTAGE FOR OFFLINE EDIT.
I don’t know why we didn’t trust the proxies; I have no reason to believe they wouldn’t work. I just felt better bringing the data in through the log-and-transfer route.
Dane Brehm, a San Francisco-based camera assistant and DAS, says that the log-and-transfer method causes the gamma curve of the imported image to be linear, which doesn’t offer much opportunity for color correction. The footage I imported looked dark and dingy, with most of the information crammed between 0-40 units on the waveform. This may be a result of me protecting the highlights too aggressively during the shoot, or it may be the linear gamma. Either way, it worked well enough for an offline but not so well for color correction. I saw banding appear fairly quickly when I brought the gains and the gammas up to “normal”.
While writing this article, though, I compared the waveform traces of the corrected “linear” log-and-transfer files and the RedLog rendered files and discovered the same amount of banding.
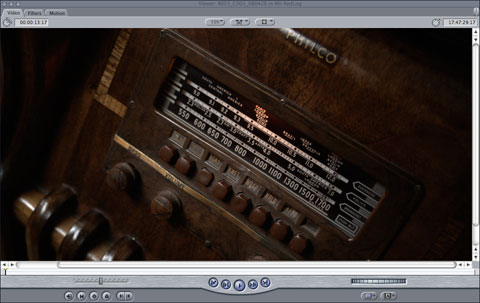
This is the radio, as it came in through log-and-transfer:
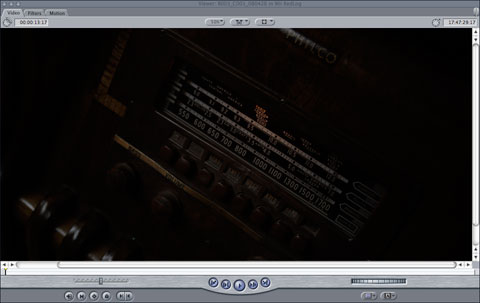
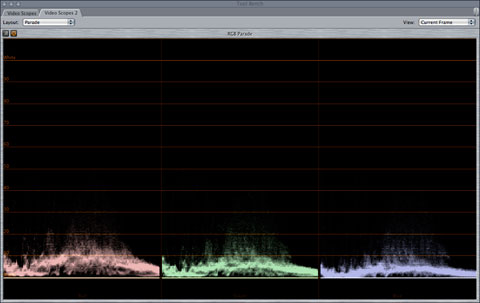
The radio after a basic color grade is applied. Notice what appears to be banding in the darker tones on the waveform monitor:
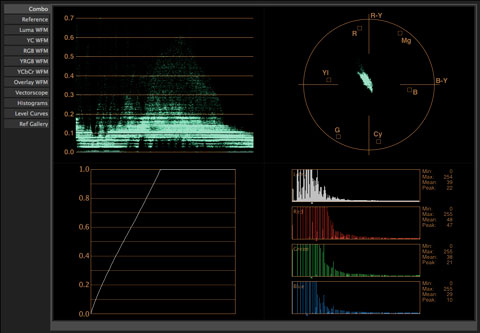
This was the result of taking the same shot, processing it through RedLog, and applying a color grade that roughly matches the log-and-transfer grade. The scope says the same banding issues still apply:
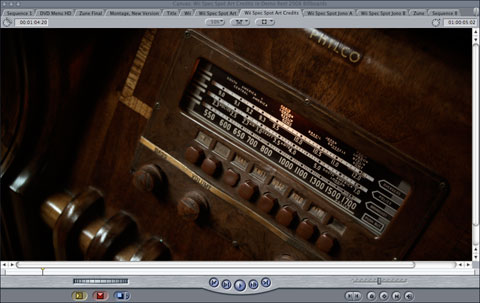
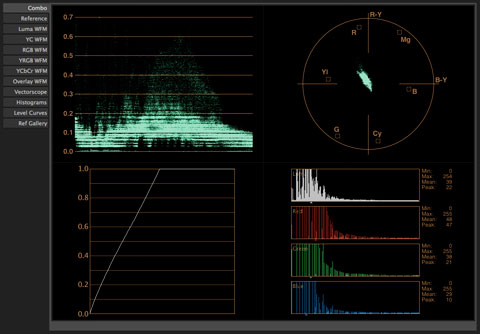
Strictly from a color grading perspective it looks like I got the same results working from the “linear” log-and-capture input versus the RedCine processed RedLog files I used instead. I suspect there is still some advantage to processing through RedCine (noise reduction, doing a rough grade in 12-bit before dropping to 10-bit ProResHQ) but for lower-end projects maybe log-and-transfer is enough. I’m not savvy enough to know how to figure out the differences. (Maybe Adam Wilt will step in and enlighten us! Hint…)
I tried saving a preset in Red Alert and referencing it in the RED log-and-transfer function. My hope was that I could set the preset gamma to RedLog and save myself a rendering step. Log-and-transfer did not seem to “see” the gamma setting in the preset; there was no change in gamma by selecting the preset.
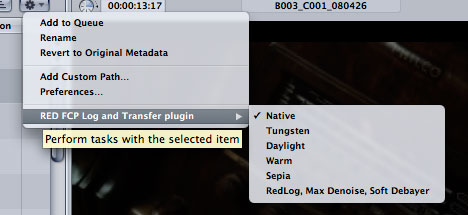
The last option is my RedLog preset that I created in Red Alert. It had no effect on import gamma.
(3) AFTER OFFLINE, RENDER THE SELECTS FROM THE ORIGINAL R3D FILE THROUGH REDCINE OR REDALERT.
This blog post, which references a conversation with Graeme Nattress, of RED, says that the proper use of RedLog is to use the exposure slider to keep the edges of the histogram from clipping, and then simply export the footage to your preferred format. The resulting image looks flat, but RedLog is designed to get all the data off the sensor and into a space where you have access to all of it for color correction.
This is the flat RedLog image as it was rendered by RedCine:
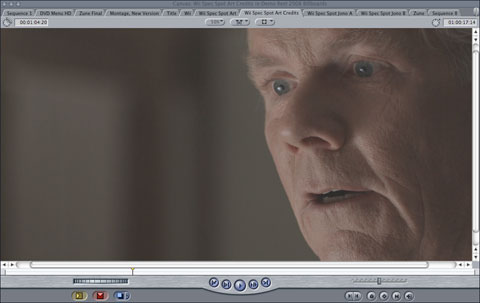
Basic color correction applied with Colorista:
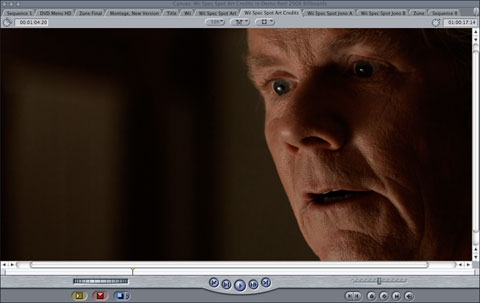
Slight vignette added with a second layer of Colorista (which is a great tool to create fast vignettes):
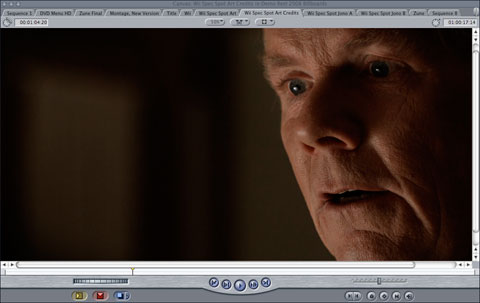
Added digital Soft F/X filter from Tiffen DFX Suite to soften actor Bob Craig’s skin a touch. This is the final look:
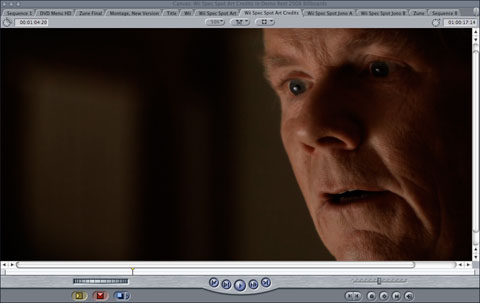
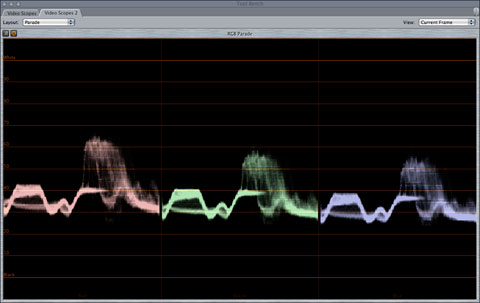
And this is what the scope now looks like:
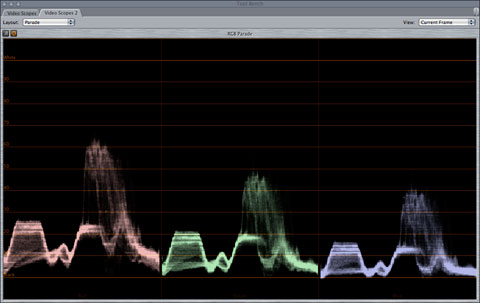
I didn’t want to do much color correction in RedCine or Red Alert because I don’t like the analysis tools, or tool: a histogram is not useful for white balancing or black balancing an image, setting exposure, or properly assessing an object’s brightness within the frame. You also can’t match shots very well using a histogram. You can tell when you’re clipping data, and when you’re grossly over- or under-exposed, but that’s about it. I wanted to be able to use “real” tools to see what I was doing during grading, especially since neither RedCine nor RedAlert allowed me to output an image to an HD monitor for critical viewing. By outputting to RedLog and correcting in Final Cut Pro I was able to watch a color critical image on a 30″ HD monitor.

Tell me how that histogram helps me dial in a white balance, a black balance, or place flesh tones at a specific brightness level.
I still ran into banding issues, which I suspect has to do with two things:
(a) My untreated RedLog outputs put all the information between 20-80 units on a waveform monitor, which meant I had to do a fair bit of massaging just to set black, white and a proper gamma. By that step the information had been rendered from 12-bit RedCode to 10-bit ProResHQ, which didn’t help.
(b) The monitors I used were, of course, 8-bit, which probably contributed. I could still see the banding on a waveform, however.
Recently I had the pleasure to meet UK DP Terry Flaxton, who showed me some beautiful RED footage he’d shot at Yosemite. He created some wonderful looks in RedCine, and in the future I suspect I’ll do more rough work there before exporting footage in the future. I think that, at the very least, it will be beneficial to roughly lay out the exposure values in RedCine or Red Alert before exporting to ensure that when they are finally massaged they don’t have far to go, minimizing banding issues.
I just hate that several digital camera systems don’t offer much more than a histogram to judge exposure with, and I hate that the two common post tools for processing R3D files don’t offer anything more sophisticated than a histogram. I want an RGB parade waveform monitor and a vectorscope, please!
The settings I used in RedCine were:
Project room: Color Space: Camera RGB (Rec 709 looked awful), Gamma: RedLog.
Color room: OLPF Compensation-Sharpen: 0, Detail: Low, NR: Enabled. I figured that I didn’t need to add any sharpening to a 4k image that was destined for NTSC.
Output room: Format: Quicktime + Apple ProResHQ, Filter: Sinc (seems to be the filter to use for scaling images downwards), Separate Folders per clip (click the window that says “Event” to select).
I strongly suggest that you render the clips into whatever format your deliverable will be in. I rendered 2k clips and we cut and color-corrected from those, but then it was a pain to get the output to an anamorphic MPEG-2 NTSC file with the proper letterbox. (Padding the top and bottom by 26 pixels in Apple Compressor seemed to do the trick.) It’ll be much easier if you cut on a more rational timeline, like 1080p. Compressor has a better idea of how to scale that down than it does a 2048×1024 file.
At any time hit “H” in RedCine to get a list of partially explained commands.
(4) RECONNECT THE OFFLINE CLIPS WITH THE NEW, PROCESSED REDLOG CLIPS.
If you’re like me, meaning you don’t have tons of time to waste in daily life, you’ll probably use RedCine to batch process your footage. Make sure you select “save clips in separate folders” in the output room so that RedCine doesn’t crash immediately after rendering your first file.

You’ll end up with separate folders for each clip, named “Event 1”, “Event 2”, “Event 3”, etc. You can change the name “Event” to something else, but as best I can tell it still won’t have anything to do with the name of the rendered clip. This might be adjustable, but I didn’t get that far.
Inside each folder, each clip was named a generic name that was the same as all the other clips. The folder name was the only thing different. The trick now is going through your offline clips on your timeline and, using FCP’s reconnect media tool, finding the clip that contains the same timecode. You’ll have to tell the reconnect media manager to ignore filenames, because they’ll all be different from the originals. (Once again, that might be something I overlooked in the rendering process.) If you can eyeball the right file using Quicktime, and then use reconnect media to select the file without getting an error message, you should now have the RedLog clips in your timeline waiting for color correction.
(5) COLOR CORRECT WITH YOUR TOOL OF CHOICE.
I ended up using Colorista because that’s what was available on the system I used when grading to a color critical HD monitor. I prefer Color Finesse, which allows greater control not only of lift (pedestal), gamma and gain but allows for fine control within each of those ranges.
Hopefully, unlike me, you’ll have roughed in a look in RedCine with the raw 12-bit file before taking it into Final Cut Pro and massaging it into its final form. As much as I hate its limited tool set, at least you are working with as much data as possible.
Basic, solid controls in Colorista:
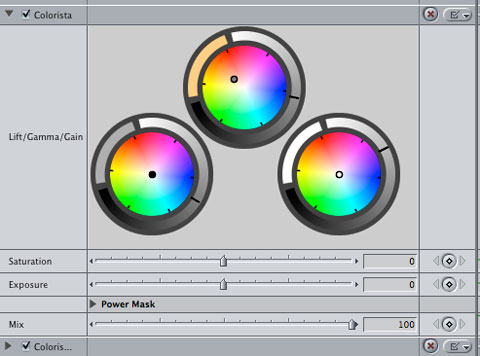
versus
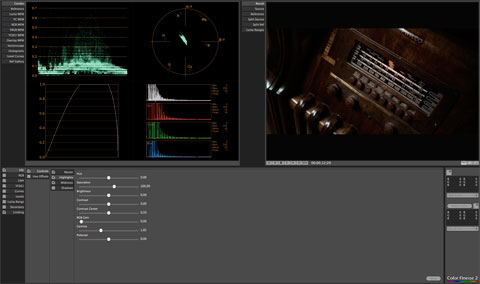
a bit more depth in Color Finesse.
(6) OUTPUT YOUR FINAL FILE(S).
Thanks to Adam Wilt I now know that the proper gamma correction to get around Apple’s H.264 gamma bug is 1.22. That’s important to know if you’re outputting for the Web.
If not, and if you’re outputting to NTSC anamorphic, remember that the letterbox padding is 26 pixels top and bottom.
I did notice, when outputting my ProResHQ timeline as a ProRes Quicktime, that I picked up bright green noise in the darkest parts of the image. That also applied if I copied an edit from one ProResHQ timeline to another. The solution seems to be to go into your sequence settings and change your rendering options to 8-bit YUV from 10-bit. That seems acceptable as most, if not all, the ways that your project will be viewed electronically involve 8-bit color.
I should note that the original post path we tried was to output uncompressed TIFFs from RedCine and grade them in After Effects using Color Finesse. For unknown reasons this didn’t work: the gamma in the Color Finesse preview window and the gamma on the output monitor didn’t match (the preview shifting the gamma up, the monitor shifting the gamma dramatically down), and there was also a gamma mismatch between what was done in Color Finesse and what we saw afterwards on the After Effects timeline. A panicked call to Adam Wilt ensued, and his guess was that gamma metadata internal to each TIFF was confusing Color Finesse, but he couldn’t tell us for sure as we didn’t have an external waveform monitor with which to troubleshoot. We promptly ran away from After Effects and did the rest of our color grading on ProResHQ clips output from RedCine and brought into Final Cut Pro.
I’ll update this workflow as people tell me what an idiot I really am and explain, constructively and in great detail, how to do it all faster and better. In the meantime, good luck!

Filmtools
Filmmakers go-to destination for pre-production, production & post production equipment!
Shop Now