In this in-depth look at Titler Pro 4, we go under the hood to look at some features that might not be apparent right away, but will definately make your work with Titler Pro 4 more enjoyable in the long run!
A month or so ago, I wrote a review of NewBlueFX’s (NBFX) Titler Pro 4 (TP4). Needless to say, if you are serious about titling, it’s a fantastic tool to have in your editing toolkit. With as much as I can fit in a review, there are always some features that you end up having to leave out, only because your review would be 10,000 words, and people would stop reading after the first 1000. So, I thought for this article I would talk about some of the great features that are specific to the Media Composer version of Titler Pro 4, as NBFX has really tried to put some features in that would make any Media Composer editor stand up and notice.
Now, before I go on, one issue with a titling application like TP4 is the learning curve. There always is one, and what make TP4 unique, is that if you’re a Media Composer editor working in version 8, you already have a flavor of TP to get you started. It’s just a question of which one. When you made either your subscription purchase or perpetual license purchase, you would have received an e-mail with a license for whichever version you were entitled to (Subscription editors get TP 2.5, and Perpetual license editors get version 2), and to download the most recent version, you can simply head to the Application Manager, and download and install the correct version. Why not practice for free, before you decide if you want to spend your hard earned money on the latest version. Okay, let’s talk about the specific features of Titler Pro 4.
Resolution Independance
Most editors and Motion Graphic designers could care less about this feature, but it’s a big one for Media Composer editors, as when we move from HD to larger than HD, we lose both the Title tool, and the Marquee Titling tool. Well, not to worry, with TP4 you’ll be creating stunning 4K (and larger) titles exactly as you would in HD projects! What’s important to keep in mind is that as much as Titler Pro is an application that promotes itself as being an “animation” plug-in, you can just as easily make awesome looking static titles to work with in any project.
Animation
As I said just a paragraph or so ago, TP4 is all about the animation. If you want to animate your titles in true 3D space, it can all be done right from within the TP4 interface with simple to use parameters, and the ability to extrude your text with the click of a button. Make it as simple (text slide on) or as complicated (3D Extruded Text flying around in 3D space) as you need to, but they key thing to remember is that even the animation is simple to create!
Promote Avid Title Tools to TP4 Titles
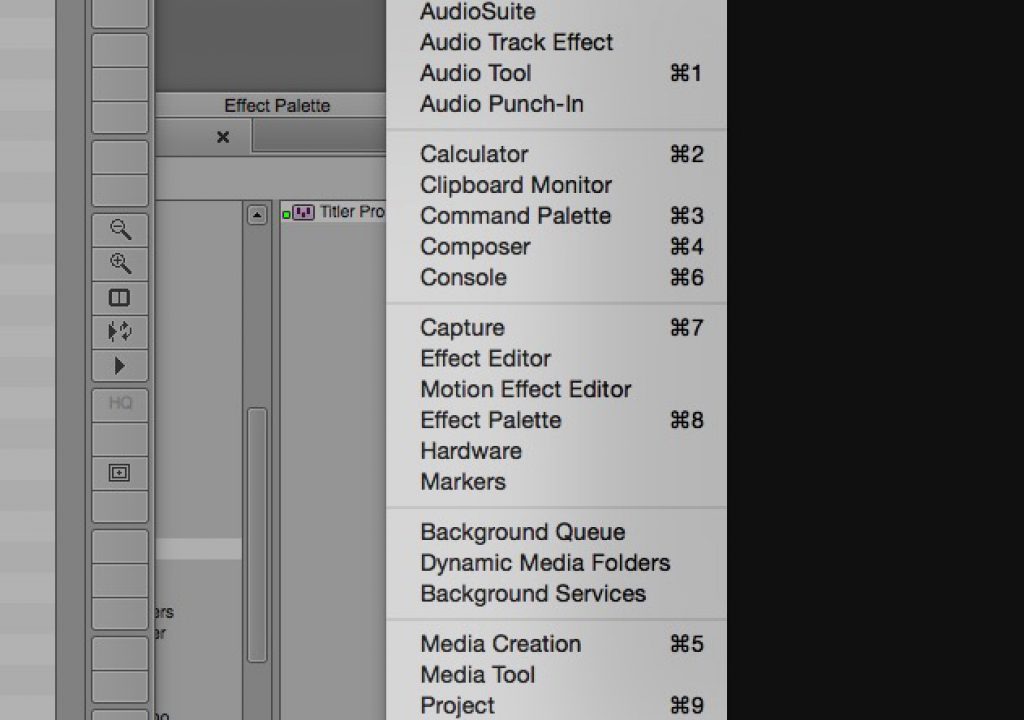
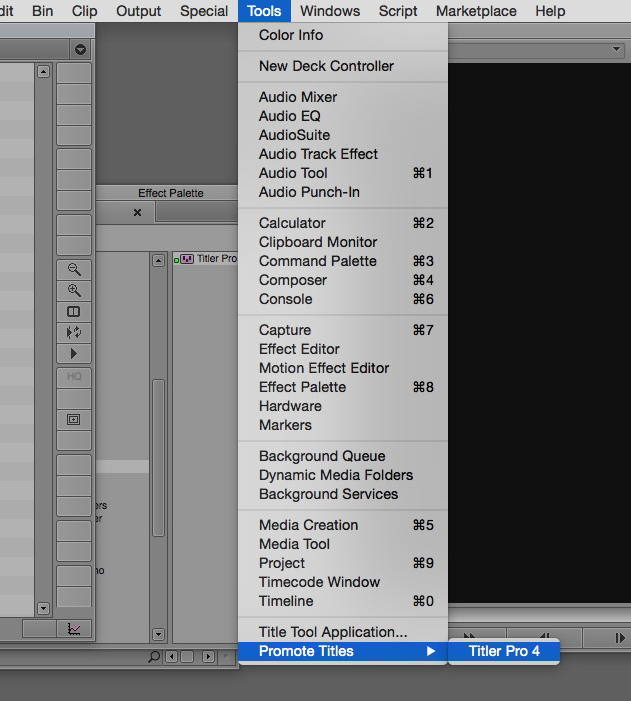
Yep, you read that right. Here’s a common situation that happens in a post production workflow. You have an assistant editor add all the titles/supers to your production, in rough, using the standard title tool. Now, you have the placement, but you need to get in and put in the actual final titles. No problem. Simply select one (or all) of the titles, and go to the Tools menu, and choose to promote those titles to TP4! Quick and simple!
The Quick Edit Window
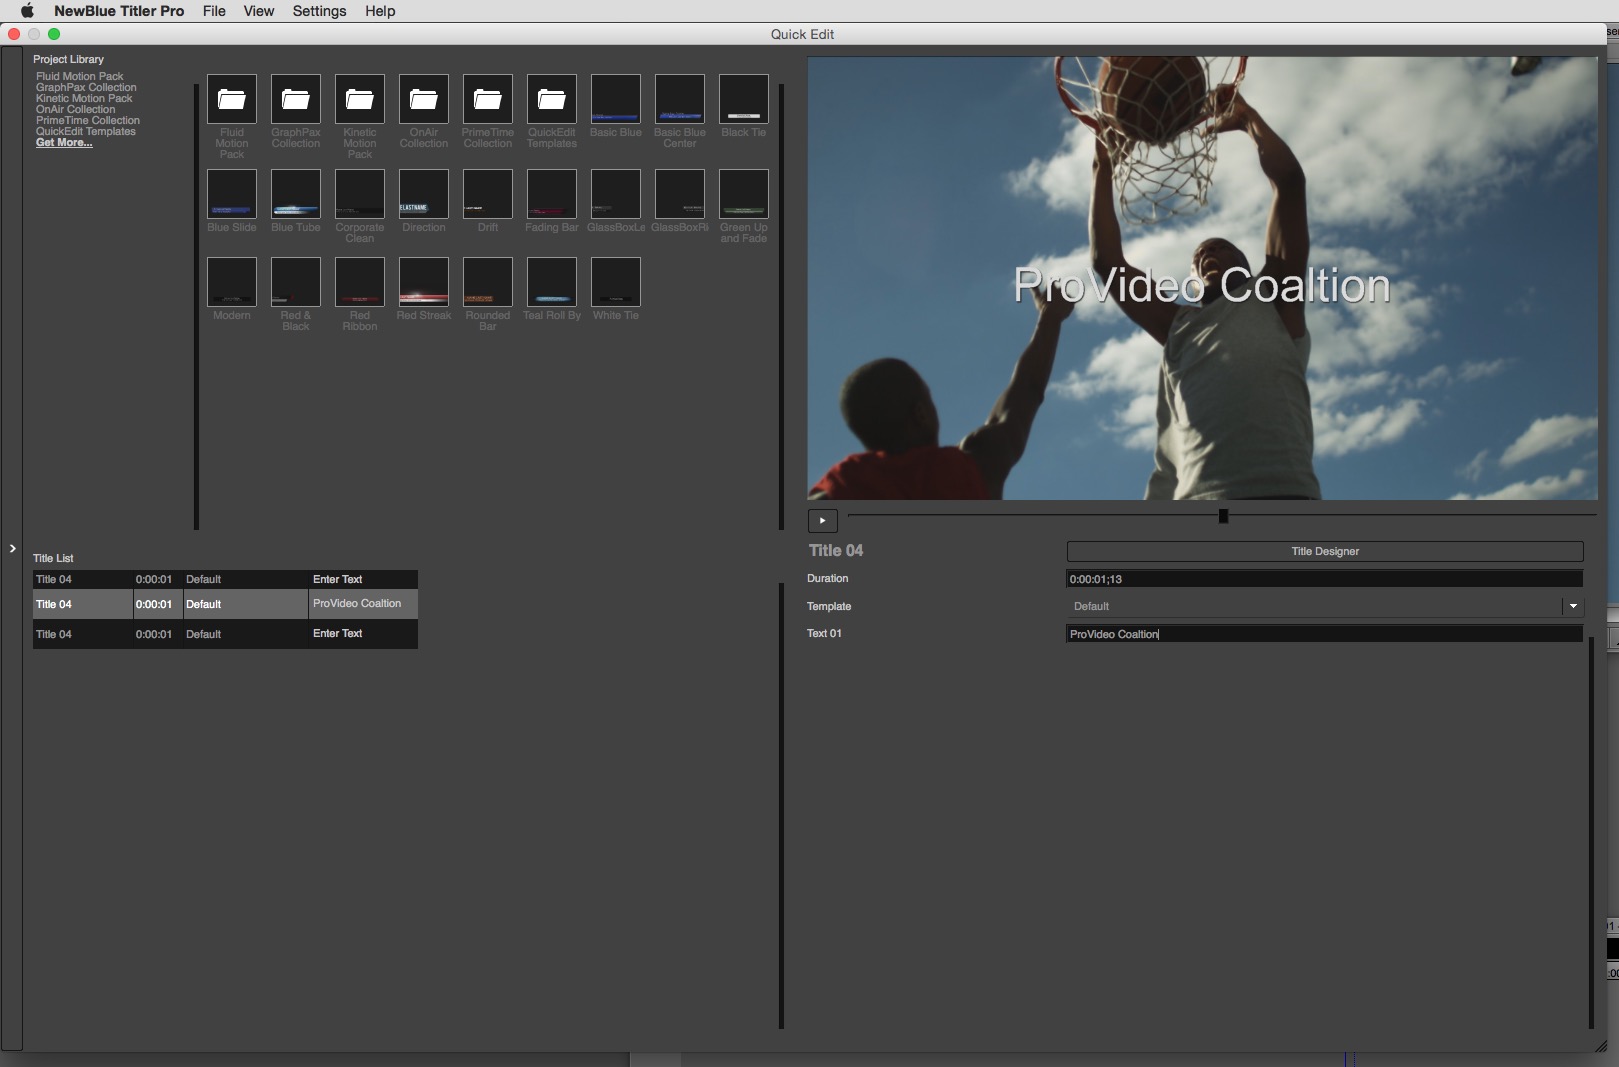
This was something that really blew my mind when I first started working with TP4. When you first launch the TP interface, you are greeted by the Quick Edit window, and most people just hop right into the TP4 interface, and start working. The Quick Edit window is going to be your “go to” location in TP4. Once you have created your “look” for your text simply quit out of the TP4 interface, and take that title, and apply it multiple times down your timeline, everywhere you need to have someone supered with the same title. Now, step back into the Quick Edit window. You’ll now notice that all the titles that have been dropped into your timeline are now numbered in the interface, and editable as well. Yes, that’s right, you can adjust any or all of the titles from the Quick Edit window, instead of having to go into each title, and edit it manually. This is a huge feature of TP4, and one that every editor will use!
It’s Expandable
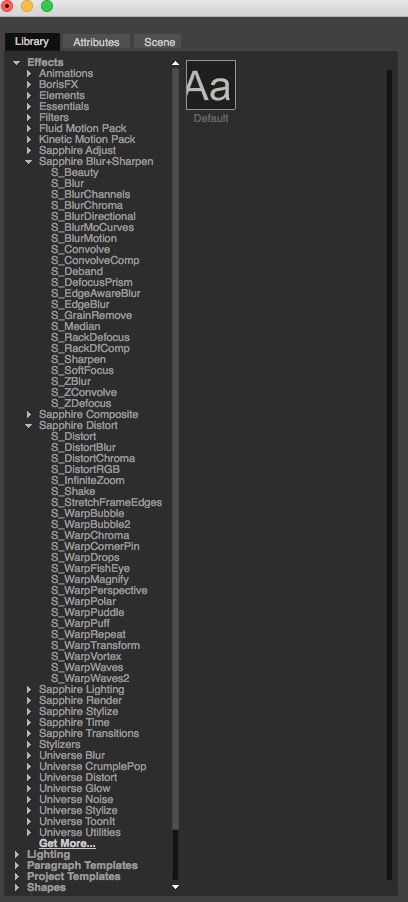
Did you know that every element, effect and transition that NewBlueFX sells can be utilized by Titler Pro 4. It’s true! Any of the NewBlue elements that you might have purchased in the past, or that have come included with a bundle (you can get some bundled with TP4) are accessible to you immedately. For me, TotalFX stands out above the crowd as it includes more than 90 effects plugins in all, including:
-
Elements 3 Ultimate: More than 250 presets in 21 video effects that simplify multi-step compositing tasks.
-
Essentials 3 Ultimate: Over 275 presets in 24 workflow-enhancing video effects that stabilize, correct and sharpen.
-
Filters 3 Ultimate: More than 250 presets in 22 video effects to instantly enhance video through an array of distinctive looks.
-
Stylizers 3 Ultimate: Over 250 presets in 23 imaginative video plugins that provide a range of light, paint and art effects
At the end of the day, for me at least, it’s all about the Presets. I don’t have a lot of time in my edits to be creating from scratch. Presets let me drag, click and go. Lightning quick.
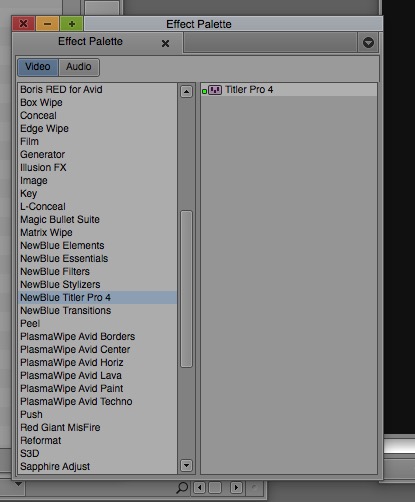
There’s even OpenFX support for TP4, meaning that you can integrate your favorite effects from Genarts or Hitfilm, and use them on your titles! Here’s a great rundown of a ton of OFX compatible effects that you should be able to use in TP4 (Thanks Michele Yamazaki at Toolfarm!)
-
ABSoft Neat Video Pro for OFX
-
Boris Continuum Complete for OFX
-
Boris Motion Graphics Pack OFX
-
Boris RED (New in October 2014)
-
Digital Anarchy Beauty Box Video
-
Digital Film Tools Composite Suite Pro 2 (New in November 2014)
-
Digital Film Tools Film Stocks 2 (New in November 2014)
-
Digital Film Tools Rays 2 (New in November 2014)
-
Digital Film Tools zMatte v4 (New in November 2014)
-
FilmConvert (New in September 2014)
-
Frischluft Flair OFX
-
Frischluft Lenscare OFX
-
GenArts particleIllusion for OFX
-
GenArts Sapphire
-
IMAGICA Primatte for OFX
-
Motiva RealPerception OFX – Full Pack
-
RE:Vision Effects Effections Bundle for OFX
-
RE:Vision Effects DE:Noise for OFX
-
RE:Vision Effects RE:Map for OFX
-
Re:Vision Effects Re:Match for OFX
-
RE:Vision Effects ReelSmart Motion Blur for OFX
-
RE:Vision Effects Twixtor for OFX
The Elastic Timeline
This is another huge feature of TP4 that a lot of editors either overlook, or underuse, and it’s a situation that I find myself in all the time. Let me lay it out for you. You’ve created an animated title in Media Composer that is five seconds long. You’ve dropped it into your timeline, and the producer/director sits down, takes one look at it, and says “I love the animation and timing, but it needs to be two seconds longer, but keep the animation timings exactly the way they are.” Well, the extending of the title is easy in Media Composer, but the big problem is keeping the animation timings exactly the same as they are in the five second version. In many cases you find yourself taking longer to adjust the animation, then you did creating it originally. Well, that’s not the case with TP4. Once you open the TP4 interface, you’ll notice a bar that stretches across the top of your timeline with an orange section, and a green section. How the Elastic Timeline (ET) works is very simple. Any animation that occurs in the orange section of the ET, won’t be altered when the timeline is extended in Media Composer. Meaning if your intro animation was 1.5 seconds, and you extend your title by 3 seconds, that animation will stay 1.5 seconds. Anything that falls into the green section of the ET (normally the static part, or slow moving part of your animation), will be extended proportionally, to however long it was extended in your MC timeline. It’s a clever way to work, and a HUGE lifesaver for any editor working with a picky producer/director.

EPS Import
Now, EPS import is important for a few reasons. First, and foremost, the EPS import feature of TP4 will let you bring in logos to add to your productions. You’ll be able to scale them up as large as you need them as they are, obviously, vector based images. Second, and this is one that not a lot of people realize, you can import EPS files from Illustrator and, assuming the logo has been broken down into layers, extrude each of the layers individually to create a very cool looking 3D animation, and of course, it can all be animated and previewed in real time, right from within the TP4 interface.
PSD Import
Again, much like EPS Import, this one is fairly self explanatory. Get your Graphic Designer to create the look that you want, and then once imported, take it to the next level by adjusting the colors (gradients) however the client needs them, and even quickly extrude elements in the PSD file to really give your text that clean, sleek look!
Save Default Project
So, you’ve just spent hours getting the look you want just right, and you want it to be the “Go To” look for your production(s) moving forward. No problem. Once you have that look ready to go, you can simply save it as the Default project type, and now every time you open TP4, it will default to this project type. When you first apply TP4, you’ll notice a pretty, well, boring font treatment as the default text layout. Anything in the templates (assuming you have them), can be chosen as the default, or leave it as to, to create your own new title treatment, each time you launch the plug-in.

Alignment Menu
One thing that NBFX has tried to do is to make your transition from the Avid Title Tool to TP4 as smooth as possible, and that is mostly in the little things like the Alignment Menu. Want to make sure that your text and other elements are aligned exactly as you need them? Don’t worry, it’s only ever a quick menu command away! Of course, you also have the ability to call up the canvas rulers, and create your own guidelines, to make sure that everything falls into place exactly where you need it to.
Quality and Caching Options
Much like other applications, TP4 gives you the ability to adjust your quality as you’re working, as obviously everyone’s system is different, so NBFX wants to make sure that TP4 is optimized for whatever system it’s running on, and you get the best possible performance, but what about when your title animation is complete, and you’re ready to save and head back to Media Composer. Well, TP4 gives you a great Caching option. You can either cache inside of TP4, so this way when you get back to Media Composer, every frame you click on has been cached, and the result appears instantly, or you have the option to exit without caching, and Media Composer will have to cache each frame as you click on it, in your timeline. To be honest, I love the caching option when you quit out of TP4, and cache on the way back to MC, as it’s super quick, and just makes TP4’s performance that much better, in my MC timeline.
As I said in my initial review of Titler Pro 4 – “For an effect that I had pretty much written off, NewBlueFX has taken what was a very basic effect, and made it a super powerful, super easy to use effect that the more I use it, the more I’m impressed by it, and I can definitely say at this point that if you’re a Media Composer editor and you’ve used Titler Pro in the past and didn’t like it, you owe it to yourself, and your clients to check out version four. For me, it’s one of the best single plug-ins out on the market today, and worth every penny of the $399 that NewBlueFX is charging for it.” None of my opinion of that has changed at all, if anything, I’m liking all of these great additional features, that I think Media Composer editors will like as well, as it gives us more of a reason to stay in our MC timelines, to create whatever type of supers we might need for our productions. You can check out Titler Pro 4 and NewBlueFX’s entire product line at www.newbluefx.com .

Filmtools
Filmmakers go-to destination for pre-production, production & post production equipment!
Shop Now