Welcome to Tool Tip Tuesday on ProVideo Coalition. Every week, we will share a new tooltip to save time when working in Adobe Premiere Pro.
Looking for a new way to apply audio fades and cross dissolves in Adobe Premiere Pro? How about a faster way to apply audio fades and cross dissolves in Adobe Premiere Pro?
Everyone can use that.
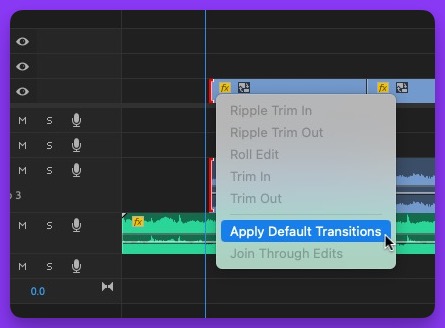
One very slow way to apply audio fades and transitions is to right-click on edit and choose Apply Default Transition. Another is to drag a fade transition from the Effects panel.

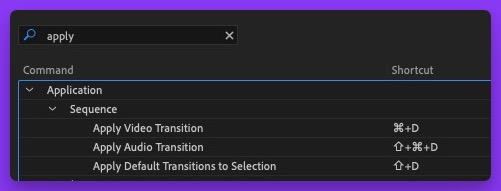
The most common way is probably to use the keyboard shortcut to apply whatever the default transition is to a video or audio edit. However, that can be limiting, as Adobe Premiere Pro has different keyboard shortcuts for different transition options.

What if there was a faster way to apply fades where you most often use them, say at the beginning or end of a clip?
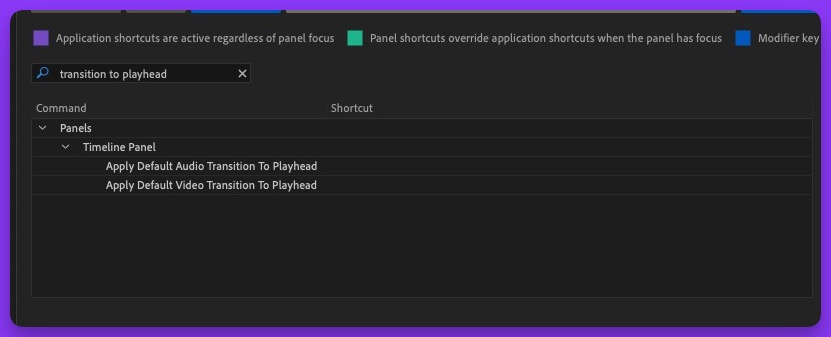
This is where an unmapped keyboard shortcut comes in handy. Open the Keyboard Customization menu and search for “transition to playhead.”

Then, map that command to a keyboard shortcut.
When that command is mapped, an audio or video fade will be applied from the beginning (or end) of a clip to the playhead with the stroke of a key.
Since these two unmapped keyboard shortcuts are two different shortcuts for either the default video or audio transition, they can be more surgically used since you’ll most likely use one more than the other.
Of note, this command respects the selected clip first and track targeting second, so you can be more precise in how you use this handy shortcut. And it also might not work as expected when you use this command on adjacent edits. Instead of a dissolve between the two clips, a transition placed with this command will fade from black, hence why the focus above is the use as a fade, from the beginning or ending of a clip.
That can definitely save time.
This series is courtesy of Adobe.

