Welcome to Tool Tip Tuesday for Adobe Premiere Pro on ProVideo Coalition. Every week, we will share a new tooltip to save time when working in Adobe Premiere Pro.
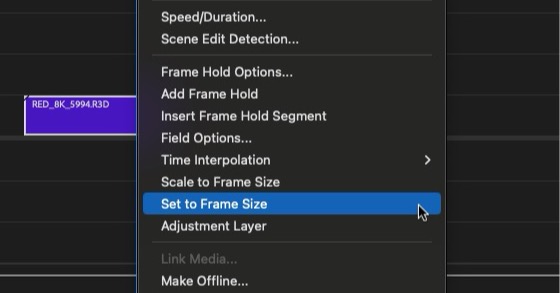
Do you often edit media that is larger than 1080 into your timeline? Of course, you do. You may already know that using the Set to Frame Size command is the way to go when scaling high-resolution media down to fit your timeline resolution.

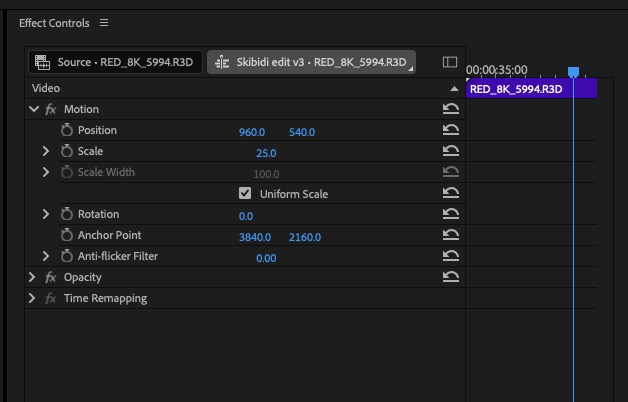
Using Set to Frame Size will automatically adjust the media using the Motion > Scale parameter so the high-resolution clip fits in the timeline while retaining the source resolution so it can be scaled up and repositioned later and still look good.

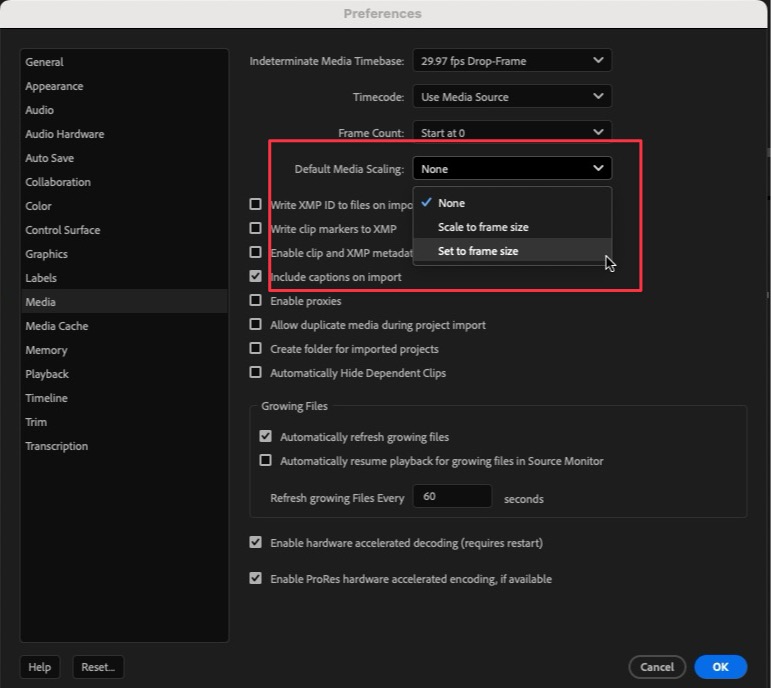
But here’s the real tip … If you’re using a lot of high-resolution media in a 1080 or 720 timeline, you can skip the manual Set to Frame Size step by setting the Default Media Scaling preference to Set to frame size.

By setting that preference, whenever you edit media into the timeline that is a higher resolution than the timeline itself, that media will automatically be set to frame size where you still have that extra resolution for repositioning shots.
Be sure to check the edges of any clips set to Frame Size. Depending on the source clip’s resolution and aspect ratio, you may have transparent borders at the top and bottom of the scaled clip if it doesn’t fit perfectly into the timeline.
This series is courtesy of Adobe.

