Welcome to Tooltip Tuesday for Adobe Premiere Pro on ProVideoCoalition.
Every week, we will share a new tooltip to save time when working in Adobe Premiere Pro.

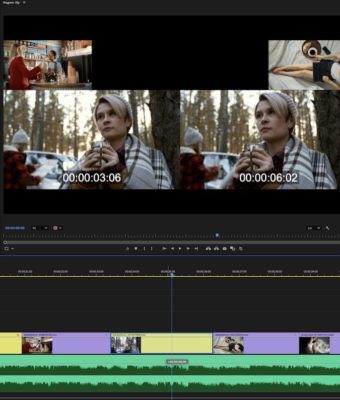
The fastest way to slip is this tip!
Most editors get the idea that cuts happen on beats (or just off beats) – or according to interview/main story speech.
But a key hallmark of craft is that moments in the middle of clips sync in some way, such as when someone says a word or the beats of music.
When evaluating an edit, I’m looking for these moments along with when the cuts happen.
Often, what I need to do is adjust the middle of a clip – not when It starts or finishes, but the content.
Hopefully, you know there’s a tool specifically for this. It’s called Slip tool

You can find that as the letter “Y” key in the default keyboard. You can click on a clip and drag it right and left. The clip remains in place but the first/last frame changes to earlier or later in the clip.

Here’s the tip. You don’t need the Slip tool
You only need to select the clip and know the correct keys to slip.
- Press D to select the clip
- Now, CMD-Opt L/R arrows will slip the clip. On Windows it’s Ctrl+Alt + L/R arrows.
Want a better-looking edit? Take five minutes right now and go through that B roll. Slip clips so that you’ve aligned action to music, beats, and narrative spoken moments.
This series is courtesy of Adobe.

