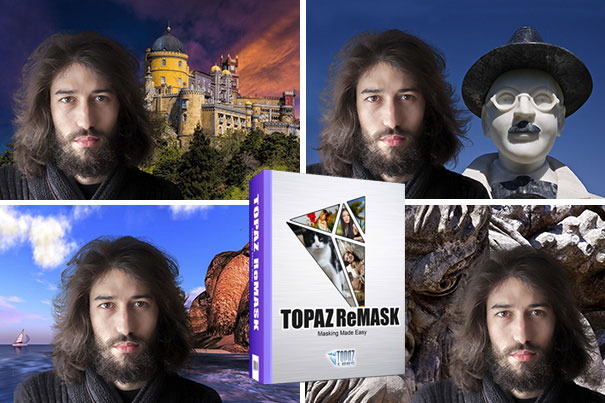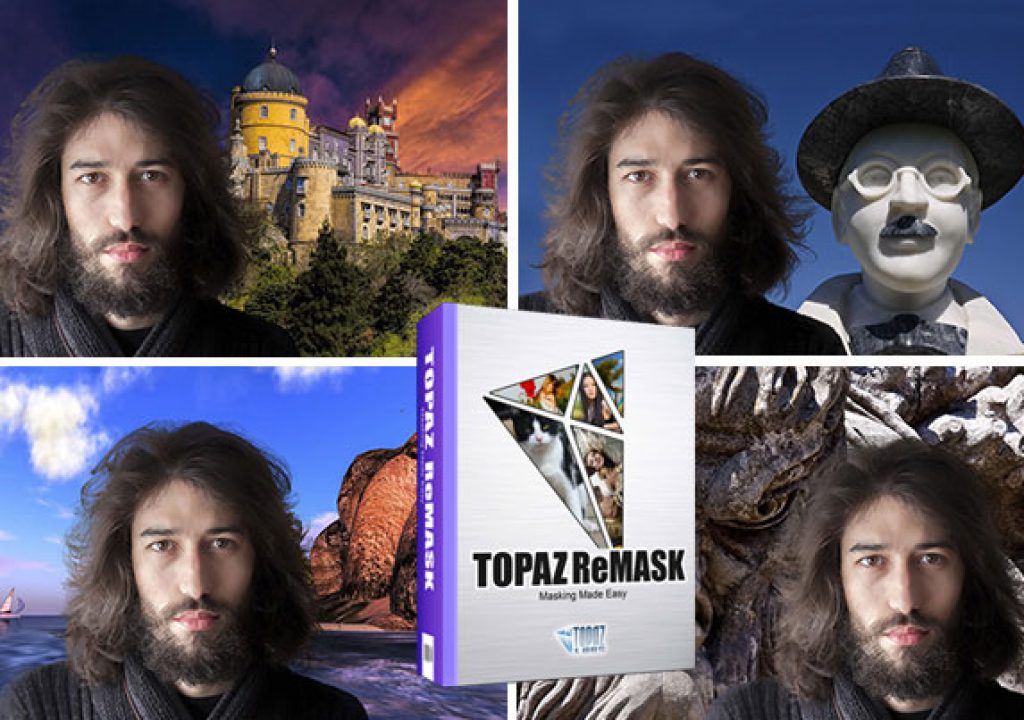
The previous versions of Topaz ReMask worked only as a plugin, but now the software works also as a standalone program. It is good news for those who need to create masks and layers, but do not have or do not know how to use Photoshop. For photographers who only use Lightroom, Remask 5 may be the best choice available for creating masks. Even if you just need to create masks for some stills on a video, this is a practical way to do it. Try the demo available.
I am not the kind of photographer who mixes elements from different photos, but one should never say never, even if only for the sake of trying tools, to understand them. You never know when a tool may just save the day – like when a client wants a different background behind the product you patiently shot in the studio or outdoors – so it’s better to be prepared.

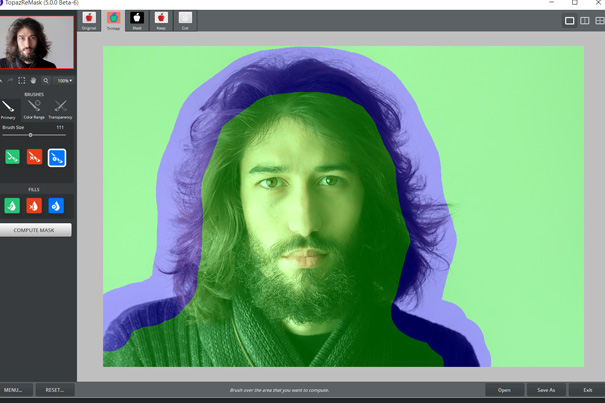
In Topaz Remask you use the Blue brush to define the edges of the area you want to keep. When you open an image a Green layer covers it completely. Remember, Green is to keep
Masks and layers are forbidden words for some. The simple idea of having to deal with them makes people look the other way. Now, if I told you there are, these days, easier ways to get elements from one photo into another, would you be interested? I guess so, that’s why I wrote this long article, about the software Topaz ReMask, from Topaz Labs. I’ve known it – although seldom used it – since version 3, and now that it reached version 5, from which I just tried a beta version, I felt it was a good idea to share my experience and some tips with those readers that might just need a way to transfer elements from one photo to another one.

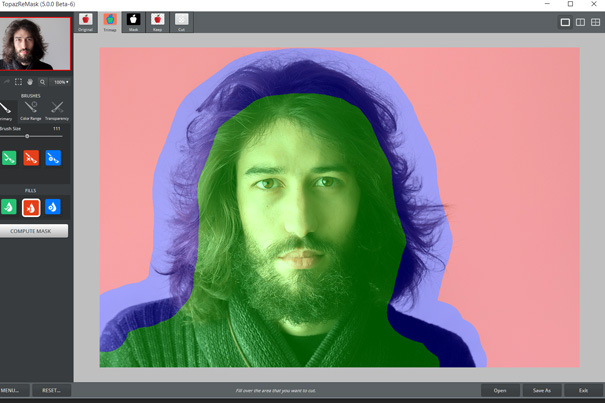
Use the Red bucket to fill the area that you want to go away. Once you’ve done it, move the mouse over the Compute Mask button, press… and the magic begins
There are multiple reasons to mix elements in photos, from the pure fun of creating something new, to the pursue of one’s own style, not forgetting the satisfaction of a client, as mentioned above. There are very precise and professional ways to do it, a task that before took a long, long time, but nowadays is more accessible to the general user, through programs like Topaz ReMask, from Topaz Labs.
It is possible to do these operations in editors like Photoshop, but it’s usually a less “in your face” process for most users, demanding a deep understanding of how masks and layers work to get something done. Fortunately, tools like Topaz ReMask make it almost automatic to get good results. It should be said, though, that as with all other editing tasks in photography, the more time you devote to the work at hand, the better it gets.
When the program finishes computing the mask you have a mask (right) and the original photo (left) to compare. The mask shows how well Remask 5 deals with hair. In some cases, though, you’ll need to use the Magic Brush and retouch the most difficult areas. It is easy: Green keeps, Red removes
Topaz ReMask does a fantastic job, but be prepared for some final adjustments, that will be more or less complex depending on the initial images used. So, in the end, you still need to understand how the tools work, even if some of the hard work is done for you. Investing time to learn and practice is the best advice I can give you, even if the results you get from using these tools are almost magical!
From version 5 onwards, just launched, Topaz ReMask works also as a standalone program, besides being a plugin, and also offers the option to replace and edit the background of your masked image without leaving the program. Users can choose from transparent, solid colour, or image backgrounds. These are the new features of a program that was designed around one simple idea: to create the best quality mask with minimal input.
Once you’ve created a cutout and mask, the fun begins. You can save it and use it as I did here, placing my older son in multiple places in a question of minutes
ReMask uses simple 3-colour tri-map technology — green, red and blue — to enable users to quickly and easily extract even the toughest elements — hair, foliage, and transparent materials — in their photos. The interface is simple and the logic too. You use the blue brush to outline the area you want to protect, then fill with red the area to cut and with green the area to keep (in normal mode the green is already active, so you just use blue and red). Then you ask the computer to… compute. Topaz Remask will make its calculations and will give you a final cutout and a mask for it, depending on how you set your preferences. You can just use the cutout as a layer in your photo editor – if you’re using one, that is, as ReMask works independently. After the computing is done, you have five different previews available — Original, Trimap, Mask, Keep, Cut —, which can be seen individually, two side-by-side or four at once. This allows to view the results and where touch-ups are needed.
It’s at this point that you understand one thing: no amount of magic will work with more complex images, and you still have to use brushes and patience to clean the edge areas of your image, especially if you’ve details like hair or leaves on a tree. The tools present in Topaz ReMask 5 will help you to make this, but as I wrote above, the more time you invest to get a perfect result, the better your final image will be. This said, the tools are much easier to understand than those from Photoshop, and the results are good.
I tried Remask 5 with a different porttait photo, darker, and felt it was just right to use a night photograph of a place my older son visits regularly. He and his friends laughed when they saw the result
The results from Topaz Remask 5 can be further adjusted in Photoshop, if you know how to use the mask refinement features present there, but the program from Topaz Labs takes the heavy load from retouching, making some of the work a breeze. Besides the 3-colour tri-map technology, the program offers a Magic Brush that detects areas to be worked and to be left alone, allowing for a faster workflow. Simply swipe the brush, then sit back and enjoy the show! Remake instantly recalculates the section based on the characteristics of your keep and cut areas.
The first photo used for this tutorial, here in a size that shows how well the hair areas were automatically adjusted by Topaz Remask 5
The program also includes Colour Range and Transparency Brushes, designed specifically to deal with areas which are more difficult to mask, like hair and fur. These brushes allow users to decide which colours stay and which go, so you can focus on what’s important: creating your masterpiece.
Even if masks are the way to go to replace unwanted backgrounds or create new compositions, creating masks can be difficult, tedious and time consuming. ReMask will change this. And the good thing is that once you’ve created a mask for some elements, you can keep it to try new compositions (save the file as .psd, for example). I did exactly that and had a lot of fun with pictures of my two sons, moving them to different backgrounds. I went over the top with it, as I do not usually change elements on my photos – that’s my journalist background at work – but the results, besides making everybody laugh, showed that this is a practical tool that many will want to try.
I could not resist to get my younger son through the same treatment, so I got a photo of a town close to where we live to use as background for a picture I had taken him. This was done in a question of minutes
Although Topaz ReMask 5 automatically and almost magically creates masks for you, it should not be looked upon as an “auto” solution that will make the whole process easy. There is a learning curve that some might find steep — there is an user’s manual on Topaz website you should download and read through —, and the more you use the program the better you become at retouching, meaning you’ll get better results. There are two aspects I think are important: Topaz ReMask will help you understand how masks and layers work, in general terms, and that’s already a good thing, and it will make you actually enjoy the labour of creating masks. I know it did for me. But one thing should be remembered: the time invested will be reflected in the final image.
Topaz ReMask 5, an updated version of Topaz Labs masking software, complete with new features, is available now, and at special price until September 18, 2015. Use the code GetReMask5 when buying and you’ll get $20 off. You’ll pay $49,99 instead of the regular price, which is $69.99. As usual, the update is free to anyone who already owns ReMask.
It should be noted that ReMask is not compatible, as a plugin, with Lightroom, Aperture or iPhoto since it requires layers and transparency. Still, users of these programs can now integrate Remask 5 into their workflow, as it works as a standalone program.


