To round out my article series on the Easy Setup (ES), we are going to take a look at the last two tabs in the Audio/Video Settings, which are Device Control Presets (DCP) and the A/V Settings (A/VS). Afterwards, we are going to wrap everything up by looking at how easy it is to create your own ES for whatever purpose you might need it for. So what are we waiting for? Let's jump into the DCP.{C}
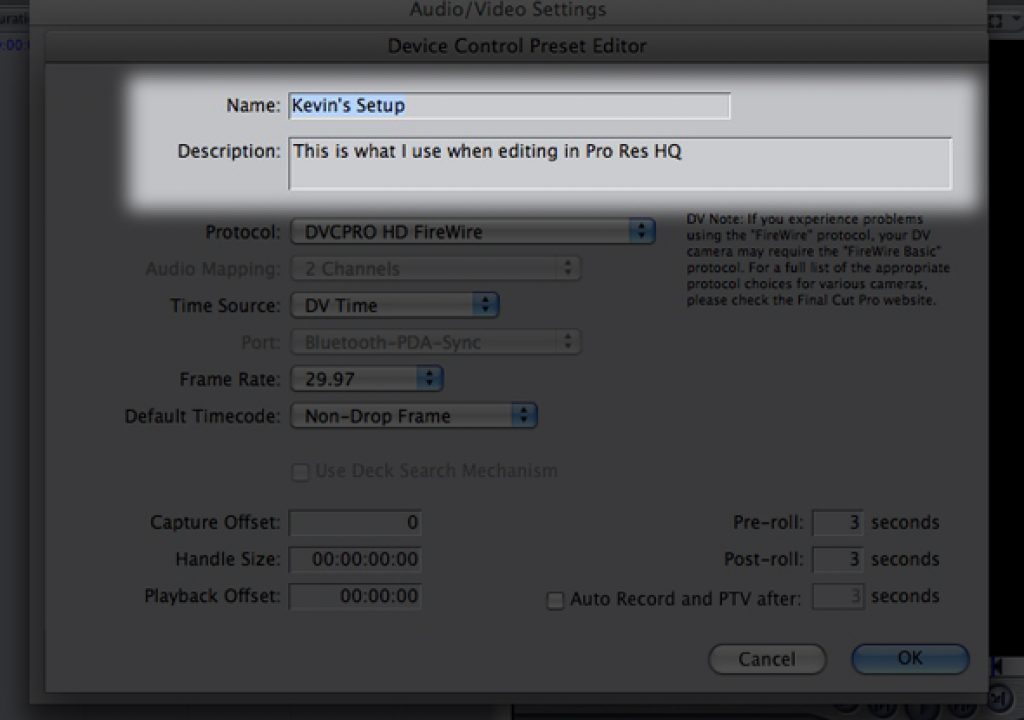
Much like before, I'm going to navigate to the FINAL CUT PRO menu, navigate to Audio/Video Settings, and then select the DCP tab. Once it's open, I'm going to select “DVCPRO HD Firewire” for the purposes of explaining what each property means. As usual, since the preset is locked, Final Cut Pro will tell me I need to make a duplicate of the setting before I alter it. Not a problem! Once I click O.K., the DCP Editor window will open, and I now see all the settings I have at my disposal.
NAME/DESCRIPTION
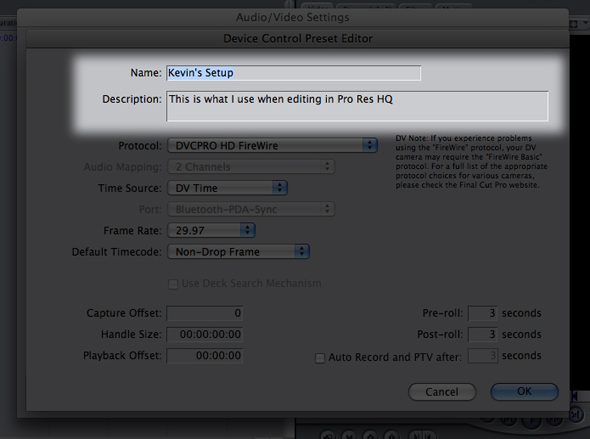
Exactly the same as in the Sequence Presets (SP) and the Capture Presets (CP). Simply enter what you want to call this preset, and give it a description. For example, “Kevin's Setup” as the name, and “This is what I use when editing in Pro Res HQ”.
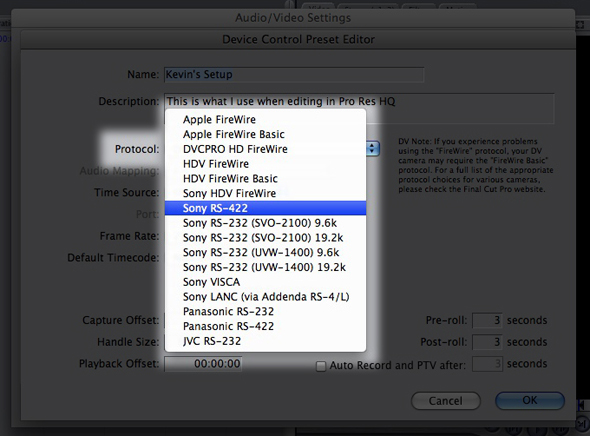
PROTOCOLThe easiest way to sum up what “Protocol” means is that it is the “rules” that govern how two devices communicate with each other. In layman's terms, it means how your computer is controlling your VTR/Camera. 99.9% of the time you will only be using one of two options and that is either RS-422 (which is standard on broadcast VTRs) or Firewire. If Firewire is your method of capture, you will have a few options as to the type of device you are coming from. As I said before, in most cases this will be a one-or-the-other choice.
AUDIO MAPPING
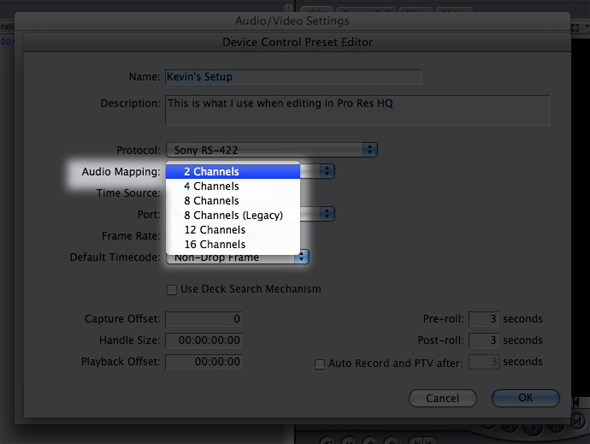
The Audio Mapping (AM) setting is used so that Final Cut Pro will know how many audio channels your VTR supports when you open the “Edit to Tape” window. The easiest way to set this parameter is to see how many audio channels your camera/VTR supports, and then adjust from there. For example, a Sony Digital Betacam has 4 channels of audio, so therefore you would set the AM dropdown to “4”. A Sony SRW-5500 (HDCam SR) VTR can support up to 12 channels of audio. The reason that there is a setting for “16” is that that is how many audio channels are supported via SDI input/output. This box is not selectable if you are using a FireWire device.
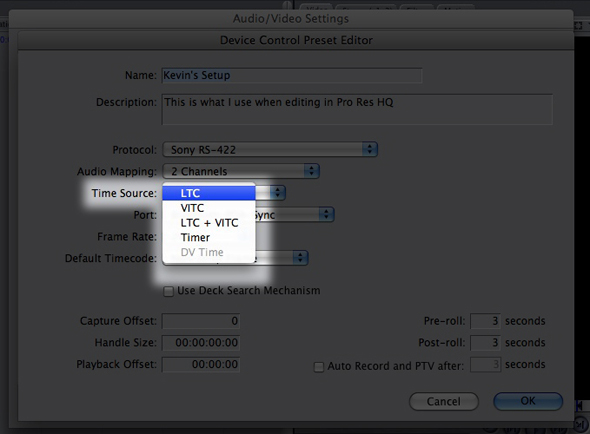
TIME SOURCE
This parameter tells Final Cut Pro what type of timecode you want it to read from your VTR. In most cases, if you are working in a professional broadcast environment, you would choose LTC or VITC, depending on your requirements for digitizing or outputting. If you are capturing from a source that does not support timecode (VHS), you would set this parameter to “Timer”. Finally, if you are capturing/outputting to a Firewire source, you would select “DV Time” as your TS.
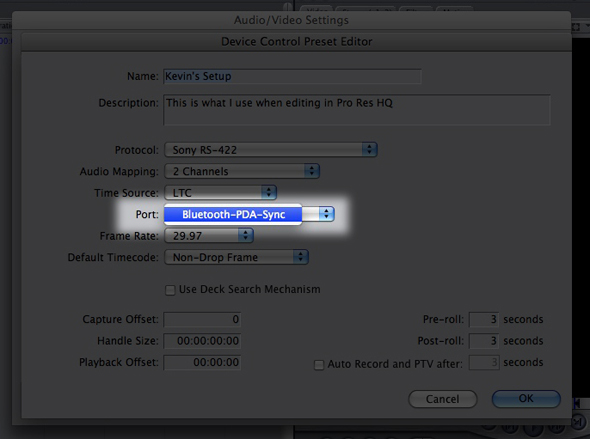
PORT
This parameter tells Final Cut Pro what port your deck (or device) is connected to. As you can see from the image below, my only option is “Bluetooth-PDA-Sync”, and the only reason that is there is because I capture via Firewire. Firewire is NOT selectable in the Port dropdown, as it is used automatically, assuming your Mac has a Firewire input/output. The Port dropdown will vary depending on the capture card (AJA/Blackmagic) installed in your MacPro tower.
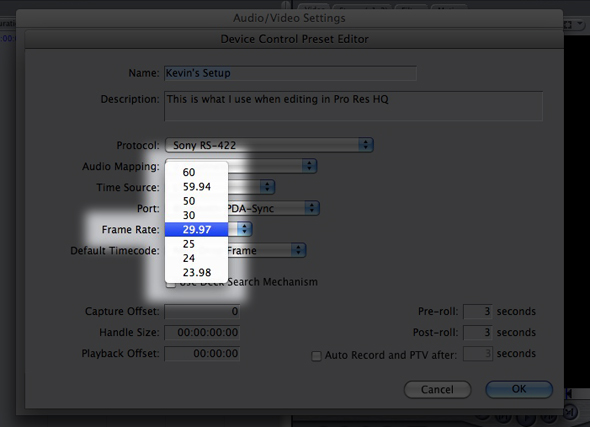
FRAME RATE
This is where you tell Final Cut Pro the frame rate of the footage you will be capturing. SD NTSC Footage and 1080i HD would be 29.97 (in most cases), and DVCPro HD would be 59.94. Make sure you know how you shot your footage before you select your FR, as you can have strange things happen in the capture tool if this is not set correctly.
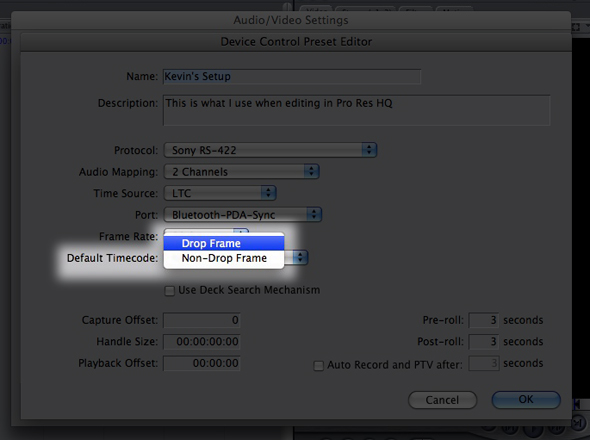
DEFAULT TIMECODE
You might think that this is the default timecode for what you are capturing, but it isn't. Final Cut Pro figures out what the timecode of your tape is (Drop/Non-Drop) as soon as you hit play in the Capture window. What this setting is primarily for is for when you are logging clips in the capture window, Final Cut Pro will default them to either Drop or Non-Drop timecode based on what you have entered here. My recommendation is to leave this set to “Drop” as this is primarily what you will be working in.
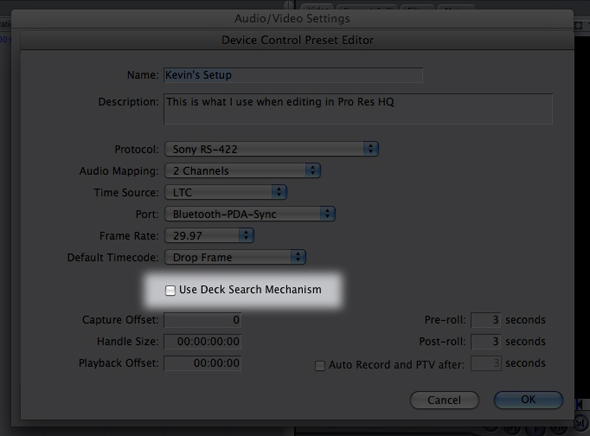
USE DECK SEARCH MECHANISM
Depending on your equipment, your serial VTR may support this option, as Firewire does not. Basically this check box will allow you to cue a tape to a specific timecode value on your tape. Pretty self explanatory!
THE BOTTOM THIRD
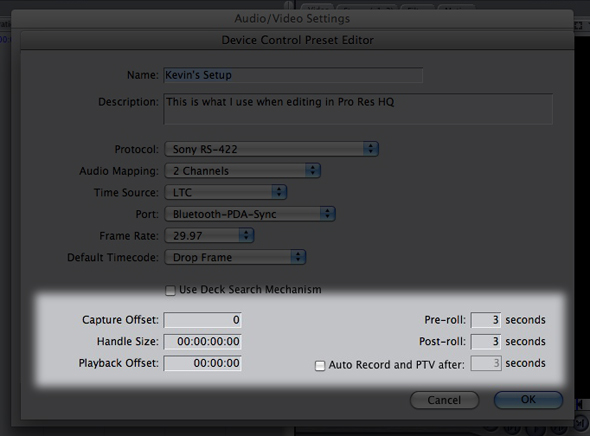
CAPTURE OFFSET/PLAYBACK OFFSET
This is a very handy feature to have. Because video comes via SDI (or Component/Composite) and T/C comes via the RS-422, there might be a delay between the T/C and video coming into your system. Here's where you can tweak your video/timecode so that they are an accurate representation of what is on your tape. I'll give you a perfect example of where you would use this feature. I do a lot of HD work, and in many cases, companies have purchased hardware upconverters to convert from 720p to 1080i. In that upconversion, there is a delay of two frames, as the upconverter needs to process the signal coming in, convert it, and send it back out again. CO is where I can adjust my video/timecode so that they are in sync to what is on my tape before the conversion takes place. This could also be applied to an SD offline to HD online process as well. On the flip side, Playback Offset is for when you are outputting to tape, and the video and T/C are taking separate paths (up/down/cross conversion) to your tape. This is how you make sure that what is on tape is directly reflective of what is on your timeline.
HANDLE SIZE
A great way to always have a little more footage at the top and tail of your batch captures is to input a time value in this box. Whatever value you enter, when you batch capture, that extra time will be captured so you can always make sure you have enough footage for when a director says “Can I have a dissolve there, instead of a cut?”
PRE-ROLL/POST ROLL
Many VTRs need a few seconds to sync themselves to the Edit System that is sending them their signal, and some older VTRs need a little more time to do so. Normally, I use the standard five seconds for Pre-Roll, and I leave the Post-Roll at three seconds, and I haven't had any issues digitizing or outputting to a wide variety of VTRs (BetaSP all the way to HDCam SR).
AUTO RECORD AND PTV AFTER:
This is only relevant for DV editors. This feature, once enabled, will have FCP automatically put your DV Device into record mode, and wait the entered amount of seconds before recording. A handy little feature that saves you some time and headaches!
A/V DEVICES TAB
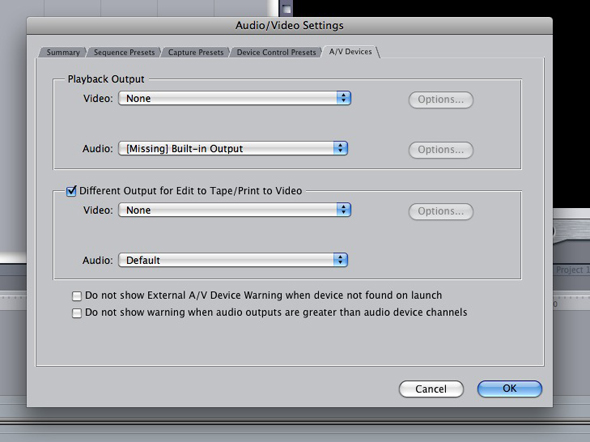
This last tab in Audio/Video Settings is the A/V Devices (AVD) tab. Depending on your capture card (or lack of), this tab will populate itself on its own, and in most cases, you wouldn't even know it's there.
PLAYBACK OUTPUT / DIFFERENT OUTPUT FOR EDIT TO TAPE/PRINT TO VIDEO
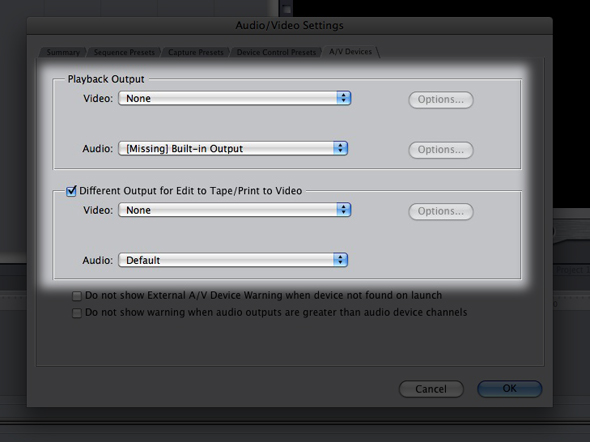
Let's assume that for this example, you have a Kona card in your computer for your capturing and output to tape. Many post production scenarios have the edit system with monitoring in one location (edit suite), and the VTR for outputting in another location (Central Tape Room). This setting is where you can tell Final Cut Pro that you want to monitor video/audio coming from the Firewire output on the back of the computer, through a converter box (ADS PYRO A/V Link for example), but when you output to tape, you want Final Cut Pro to use the Kona card for outputting, as you would be using a SDI output going to your VTR. Just because you are inputting/outputting SDI, it doesn't necessarily mean that you have to be monitoring it in your edit suite (but it would be a good idea!).
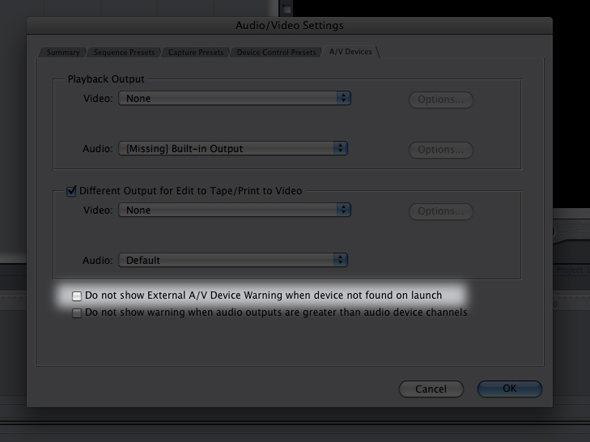
DO NOT SHOW EXTERNAL A/V DEVICE WARNING WHEN DEVICE NOT FOUND ON LAUNCH
Any editor who works with some type of FireWire device will know this pop-up window:
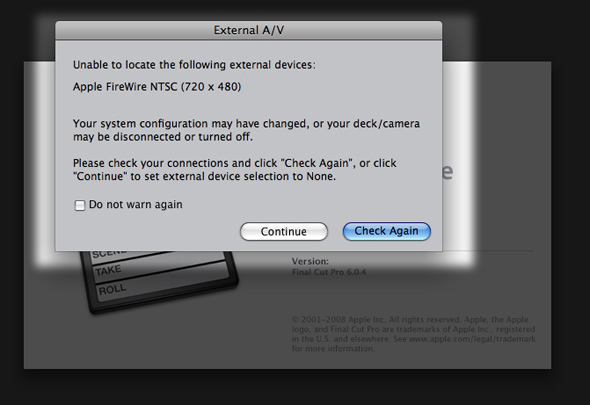
Want to disable it? Here is where you do it.
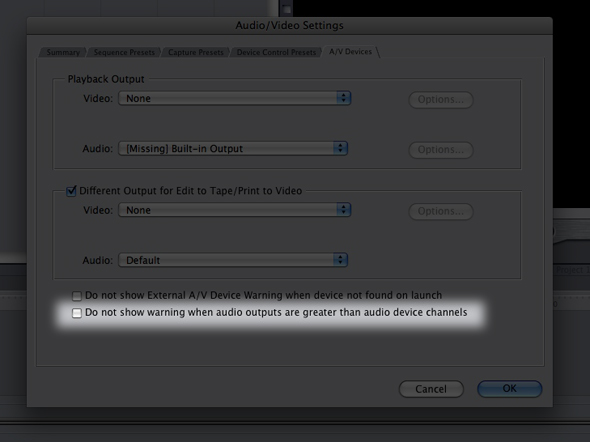
DO NOT SHOW WARNING WHEN AUDIO OUTPUTS ARE GREATER THAN AUDIO DEVICE CHANNELS
Again, pretty self explanatory. If you are working on a timeline, for example, that has eight channels that you are going to output via SDI to a Digital Betacam that only has four channels, assuming Final Cut Pro knows you are outputting to that VTR, you will receive a warning telling you that four of your channels are going to be left out. I normally disable this feature as well, as I always make sure I know what I am outputting to, so there is no confusion.
PUTTING EVERYTHING TOGETHER
So let's assume that you have to create a new Sequence, Capture and Device Preset for a project you are working on. How do you have FCP understand it, and make it selectable for you in your Easy Setup dropdowns? It's actually quite easy, and you will be using your first tab, Summary, in the Audio/Video Settings window.
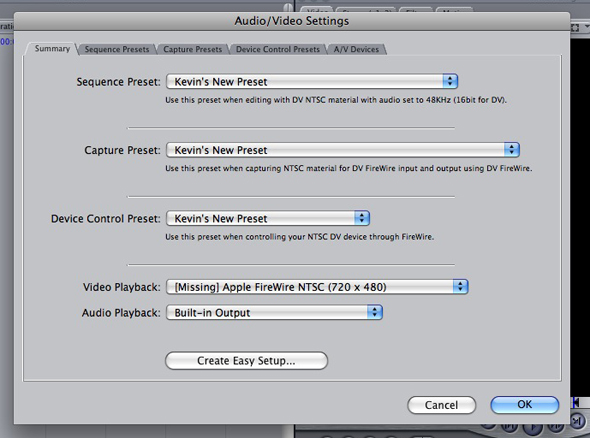
Summary is where you choose your created presets, to combine them into a workflow that will work best for you. I've created a Sequence, Capture and Device Preset for a workflow that I want to use, and as you can see, I've called it “Kevin's New Preset”. Once I have selected all the presets, and told Final Cut what my Video and Audio Playback Output will be through (i.e. – FireWire, etc), I am ready to create the Easy Setup. To do so, all you have to do is to click on “Create Easy Setup” at the bottom of the window. You will now be greeted by a window that wants you to name the setup, give it a description, and have you decide if you want FCP to notify you if it can see your device on launch.
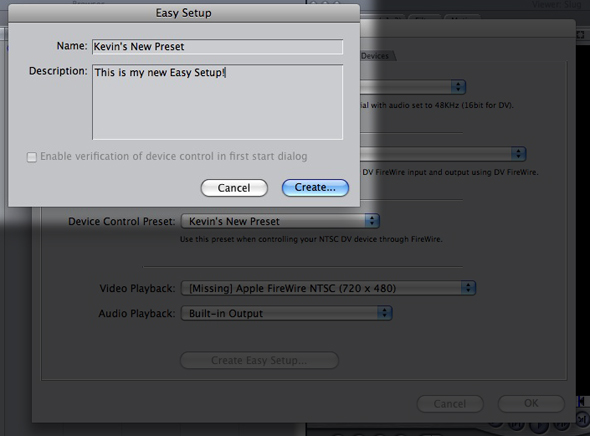
Once you have named and described your setup, click “Create”, and you will now be prompted to save it on your main hard drive. That's it, you're done! Now, to use your Easy Setup, simply navigate to FINAL CUT PRO>EASY SETUP, and depending on whether you are using SD or HD, and your FPS, you can easily find your new setup, and start editing!
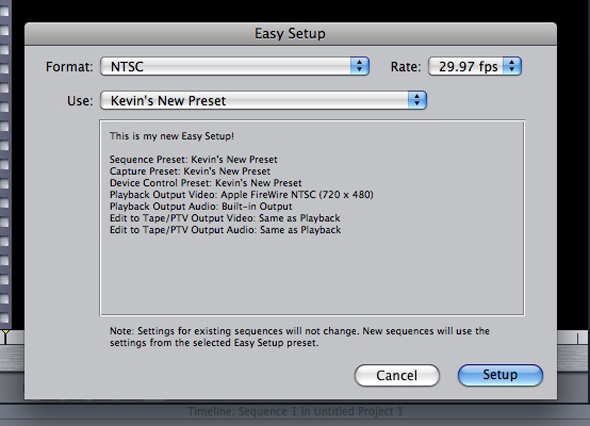
In the end, the Easy Setup was put into Final Cut Pro for just that reason. To give you a very easy way to find the workflow that is best for you and your project. But, as all editors know, workflows change, and we need to be able to adapt quickly to create a new workflow to keep our projects moving forward with as little down time as possible. Hopefully this three part series has helped you see how “easy” it really is to create a new Easy Setup to meet your editing needs. If you have any questions or comments about this article, or the series, don't hesitate to drop me a line at [email protected] .

Filmtools
Filmmakers go-to destination for pre-production, production & post production equipment!
Shop Now