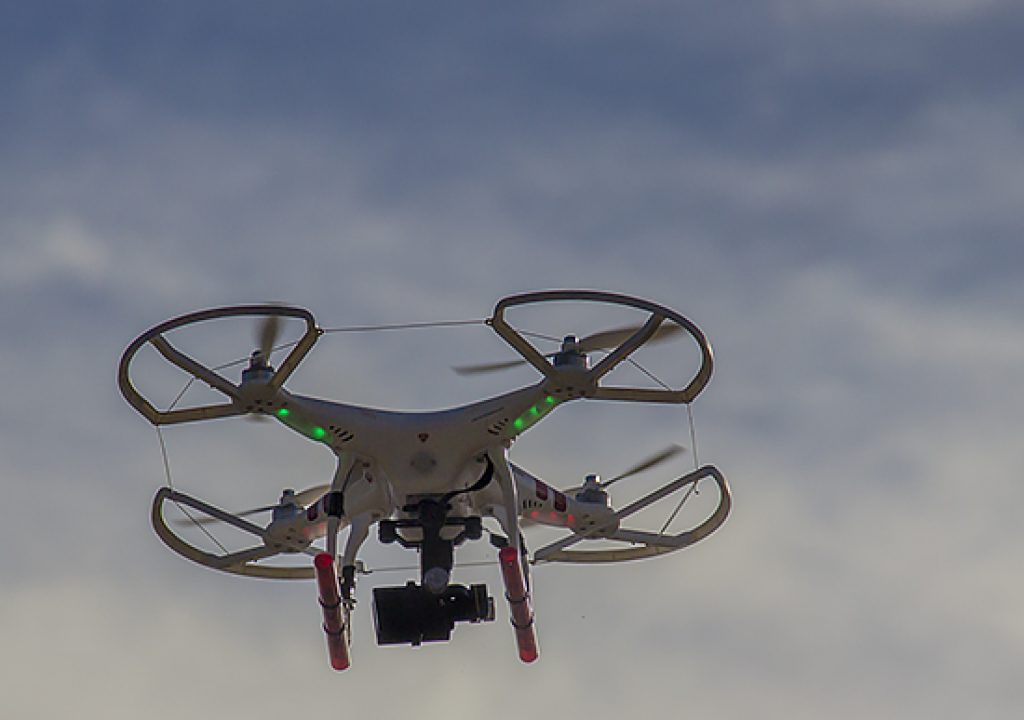
This has been a long time in the making as we've been awaiting all the hardware updates surrounding the release of the DJI Zenmuse H3-2D gimbal first introduced back in April at NAB. I've also been waiting for the updated hardware and electronics to arrive before posting this update so you can get the most current information possible, directly from the manufacturer.
Upgrades covered in this review:
• Zenmuse H3-2D Gimbal for GoPro Hero3
• Updated Motherboard/controller electronics and cabling, hardware
• Prop Guards for 8″ props
• Installation and testing – plus tips on getting the best results
Zenmuse H3-2D Gimbal: Smooth out that footage!
The first upgrade completed was the Zenmuse H3-2D gimbal that was sent directly from DJI as soon as it was available in first-production run from prototype. This meant not only installing the gimbal but also taking apart the Phantom and heating up a soldering iron. The cabling for this upgrade also included to additional boxes that connected to various points on the motherboard. Stuffing all the extra cables and components back into the housing was a real trick!
Here's a montage of some of the install/kit of the prototype gimbal but since DJI has upgraded the motherboard & other electronics/hardware, this exact process is no longer complete as there is still a lot of other components to replace in the current installation:
![]()
Here's a video from DJI on this installation procedure, should you receive this upgrade kit in lieu of the new hardware/electronics upgrade mentioned later-on in this article:
First Flight Tests with the Zenmuse H3-2D Gimbal:
My first flight tests showed a significant improvement in stabilization of the GoPro footage, but also introduced a new problem – the props dipping down into view of the camera with wind and motion (I'm hoping to look into some solutions to this in the near future). Even with the gimbal pointed-down at about 100deg, you can still see the props and roto arms dip down into the top of the frame as the Phantom moves or gets tossed by a bit of wind.
![]()
Here's a video of my first flight after installation and recalibration in front of my neighborhood by the Bay:
DJI Phantom Electronics & Hardware Upgrade:
I received an upgrade kit directly from DJI (China) that included a new motherboard for the Phantom, plus some cabling, hardware and a plastic “lever” for the transmitter that adjusts the pitch of the Zenmuse H3-2D gimbal in flight. Unfortunately, it doesn't really control the way I had hoped it would – logically allowing you to spin the GoPro pointing straight down toward the ground or up to a 90-degree straight-ahead shot. This required some jury-rigging to make work and it's less than elegant in the end. I know that my colleagues Russell Brown (Adobe) and Colin Smith (PhotoshopCAFE) have had theirs professionally modified with a knob applied to the front of their controller housing with full control. I'll most likely be going this route eventually as well. More about this to follow… first the electronics:
![]()
The new motherboard replaces the existing board plus the additional cabling and electronic components that originally came with the Zenmuse installation kit. This allows for a cleaner and more spacious installation inside the Phantom housing and less chance for shorts and connection issues. You will need to desolder the old contact points on the original board and resolder the motors' power connections on the new motherboard. If you're not handy at soldering, perhaps it's best to refer to a professional to do this upgrade.
![]()
DJI has provided a step-by-step “how-to” video to assist in this upgrade, as well as (tiny) printed instructions that come with the hardware packaging.
Continued on Next Page – – – >
Hardware & Electronics Upgrades Continued…
In addition to the electronics and component upgrades I received from DJI, I also got a new Phantom shell, landing gear and prop guards from DSLR Pros. (watch for an upcoming review on their exclusive Ultimate Cinema Edition Aerial Kit, based on the Phantom quadcopter but with much more advanced features!)
The new pop guards allow for 8″ props and DSLR Pros has some new 8″ carbon fiber props that will fit. I used the stock props for this initial fit and testing. The prop guards also come with a string that threads though and creates another barrier against poles, wires and trees, but I found that it gets loose over time and is problematic more than helpful, so in the end I just removed it and kept the prop guards on by themselves. I've found this not only gives added safety and protection from impacts, but also adds a bit of “heft” and stability to the Phantom.
As my original Phantom has seen more than it's share of “mishaps” through my trial days of flying (see video at the end of this article), it was in dire need of some new parts that WEREN'T glued and/or taped together!
![]()
Updating the Firmware & Calibration:
Any time you install new components, move components around or add new parts to your Phantom, it's advised that you run a diagnostic with the NAZA software utility you can download from DJI's support page and follow the tutorials there. Unfortunately, the software is only for Windows OS currently, but if you run Bootcamp on your Mac as I do, you can run it from there just fine. Follow the instructions in the tutorial videos – they will guide you along and get your Phantom running tip-top again! You will also need to update the firmware in your Phantom by connecting it to your PC via the USB cable and installing the updater if needed from the utility.
![]()
![]()
You will also need to make sure the gimbal switch it turned on if you install the lever on your controller (see below).
![]()
Zenmuse Gimbal Tilt Control Lever (rear of controller):
With this hardware upgrade came a small plastic lever and baseplate that attaches to the rear of the controller that turns a small rheostat switch on the circuit board inside of the unit. You must disassemble the unit to install this lever (see previous page for the instructional video from DJI on this upgrade kit. However, this lever has a squared notch that attaches to an extension rod that fits into the + detent in the rheostat switch. These don't necessarily line up exactly as laid-out and control the tilt on the gimbal at odd rotations. I might assume that each unit may be different, depending on how the switch is adjusted from the factory, I'm not sure.
In my case, I had to manually adjust the lever to “over-crank” and make marks on the back with a Sharpie to determine where “down” (facing down at 180 degrees) or “up” (looking straight-ahead at 90 degrees). I'm hoping to find a better solution for this soon as well.
![]()
Here's a test video showing the gimbal tilt lever and test flight with a slight-downward angle to try to avoid the prop guard from entering the frame. Unfortunately, I also missed the gigantic mountain right ahead of me and only see the ground and surrounding tree line.
Another test with less tilt at Davis Lake Lavaflow in Central Oregon:
Continued on Next Page – – – >
Modifying the Zenmuse H3-2D Gimbal Mount
Not satisfied with the results from my earlier test flights and getting too much of the props, prop guards and landing gear into the frame, I modified the way the Zenmuse gimbal mounts to the Phantom slightly.
I inverted the gimbal mount to lower the GoPro about 1/2″ and also rotated the plate 180 degrees so the screw mount is up front further. I only installed one screw and then used gaffer tape and zip ties to further secure it and keep it from moving, shifting or vibrating.
![]()
I also added two loose zipties from the baseplate to the gimbal plate in case of a crash or mishap and I don't lose the camera/gimbal setup (this actually happened in one crash before securing the components together!)
![]()
The result lowers the camera and pushes it out forward another inch or so and results in a little less interference from the props/prop guards or landing gear coming into frame when the Phantom is in motion in flight.
![]()
You will also notice the red tubing ziptied to the landing gear, which I added to accommodate the lowered GoPro and to provide more stability in takeoff/landing. I'll be looking into other options for landing gear, gimbal/camera mounts and more in the near future.
![]()
Finally – I got a good balance from my slight modifications to the gimbal mount and was able to get some smooth flight footage at higher and low elevations. I shot this video from Jantzen Beach on the border of Oregon and Washington on the Columbia River in Portland. I was pleased with this setup, but you know I'm going to continue to do more mods for even better footage in the weeks/months to come.
DJI Self-Tightening Propellers:
This upgrade was just announced and I haven't had a chance to test them yet, but there is a demo on the DJI website that shows this tutorial for installing them:
Meanwhile, after losing a couple of the original prop cap nuts, I've opted for a combination lock washer with a hex nut and Locktite (blue) and check before every flight (see also video below for consequences of a loose prop nut).
![]()
Words of Caution when Flying your Phantom:
Not everything always goes as planned… yes, it's usually operator error but sometimes radio interference or wind conditions can affect your Phantom's performance and it WILL come crashing down to earth or possibly fly-away into the horizon.
A few tips from my many crashes and incidents where I actually lost my GoPro in one case:
• Always do a pre-flight of your Phantom on-site. (Batteries fully-charged, prop retaining nuts tightened, etc.)
• Tether your GoPro to your Phantom's landing gear. (You will lose it when it crashes or it shakes-loose mid-air)
• Leave your WiFi enabled on your GoPro during flight. (You may need to locate the camera with your iPhone if it crashes in deep brush or trees)
• Always carry a toolkit and spare parts when flying remotely. (Just do it!)
Here's a quick montage video from some of my “incidents” while flying the Phantom:
For more information about the DJI Phantom and/or the Zenmuse H3-2D gimbal or to make a purchase in the U.S., check out the DSLR Pros website and contact them for more information.
CLICK HERE for my previous reviews and info on the DJI Phantom Quadcopter
_________________________________________________________________
Jeff Foster is a published author of several how-to books and training videos in the motion graphics, animation and video production industries and is an award-winning video producer and artist. Visit his web site to learn more about his training methods, tips & tricks at PixelPainter.com

Filmtools
Filmmakers go-to destination for pre-production, production & post production equipment!
Shop Now


