UltraHD is here to stay as more and more consumers demand content that makes them feel like they are part of an experience. Some analysts think that by the end of 2018, 10% of American households will have 4K capable TVs and by the end of 2024, that number could reach 50%. That means that it’s up to us, as content creators, to start getting comfortable with editing in 4K, 5K—or even 6K—to create Ultra HD content to meet this increasing demand.
The tools we need to shoot, edit and distribute this content are more important than ever. And, because it is not uncommon for a project that just took a few days of shooting to result into 1 to 2 terabytes of hard drive space, these big files need powerful software–not to mention bigger hard drives–that can edit the footage without choking.

Compressing Ultra HD with the GoPro CineForm Codec
Although Adobe has been a leader in its ability to edit Ultra HD footage natively within Adobe Premiere Pro, we realize, when it comes time to working with Ultra HD, compressing your file format can help your workflow. The CineForm codec has been around for a long time and I have used it for years. It is a great finishing codec that gives you faster editing without sacrificing image quality. In 2011, GoPro made a camera that supports small formats yet delivers high resolutions. They later acquired CineForm and its codec, known as the GoPro CineForm Codec, and with the most recent release of Adobe Premiere Pro, After Effects, and Adobe Media Encoder we are making it available to you as part of your Creative Cloud subscription.
Learn how the CineForm codec offers Premiere Pro users a cross-platform intermediate codec with full support for alpha and large frame sizes of 4K and beyond. We also have an extensive overview on our Premiere Pro help website.
On the technical side, the GoPro CineForm codec is a true 12-bit color codec, though it actually has two pixel formats: YUV 4:2:2 at 10 bits per channel, or RGBA 4:4:4:4 at 12 bits per channel. Adobe Media Encoder will render frames internally at a color depth that may be higher or lower, as appropriate for the incoming source, but it will encode at the true 10-bit or 12-bit color that GoPro CineForm is known for.
It is interesting to note that the GoPro CineForm Codec has been standardized by the Society of Motion Picture and Television Engineers (SMPTE) as the SMPTE ST 2073 VC-5 video compression standard – the new open codec standard for video acquisition and post production.
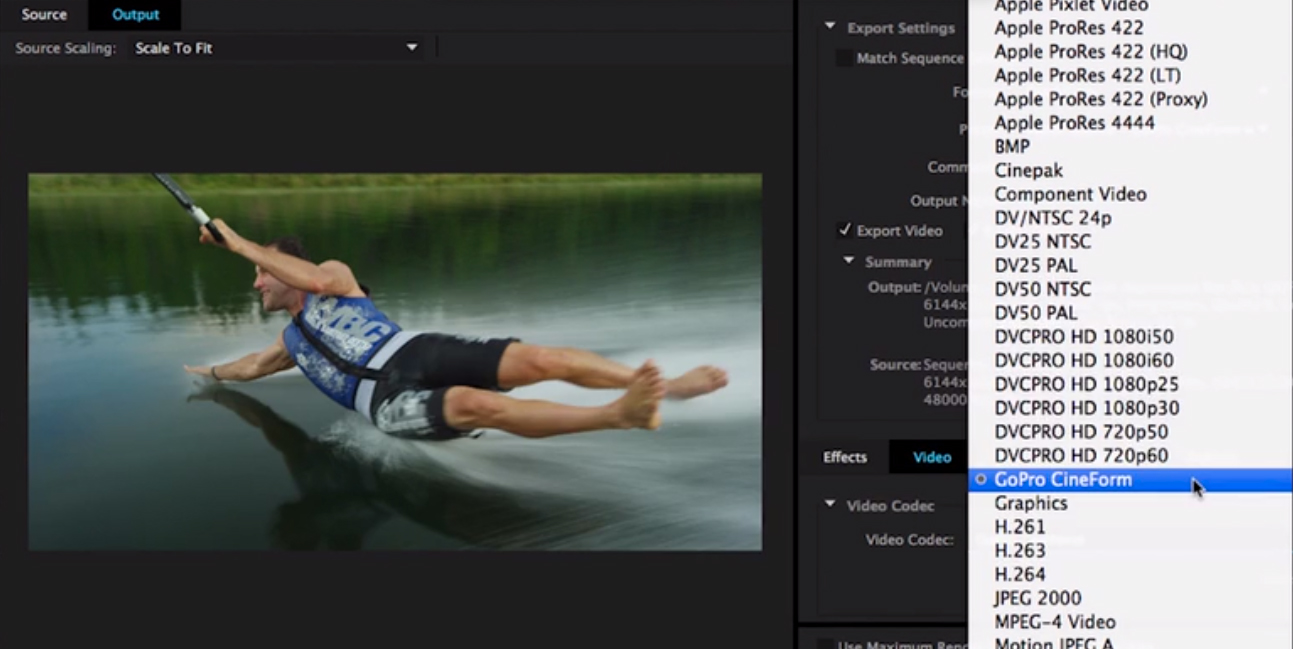
You can access this codec easily for your project in Premiere Pro. From the FILE > EXPORT >MEDIA menu, you select “Quicktime” as the format. We wrap the finished product in a “.mov” wrapper for both Mac and Windows environments, but it still has all the quality and attributes of the GoPro CineForm Codec. Under the VIDEO tab you select the codec you want and among the many familiar ones associated with Quicktime, you will find the GoPro CineForm Codec listed. You can watch my YouTube video and see exactly how this is done.
It is important to note that in a Mac environment, the resulting clips have to use Quicktime 7 for playback. In the example I use in my video for a 3-day video shoot, our 1.1 terabyte project was reduced to 43.69 gigabytes! Playback is outstanding and the quality is there.
Also, my colleague, Tim Kurkoski, wrote a blog post on GoPro CineFrom code settings. Check it out on the After Effects blog.
I hope you enjoy using this excellent codec.
Visit the Creative Cloud video page for more information on all of our post-production products such as Premiere Pro, After Effects, and SpeedGrade.

Filmtools
Filmmakers go-to destination for pre-production, production & post production equipment!
Shop Now


