In our last lesson, in our look at learning HitFilm Pro, we talked about Clip-Based Parameters and keyframing, and how essential they are to your HitFilm Pro workflow. In this lesson, I want to start talking about text, as it might seem like a fairly straightforward concept, but it’s not as simple as it seems, and in this first lesson in our look at text creation, I want to talk about a text workaround you’ll want to know, to get text created quickly and easily in HitFilm Pro.
I’ll be honest right off the bat when talking about text in HitFilm. It’s a mess. In this lesson, I’m going to talk about how you used to work with text in HitFIlm Pro, and why you might still want to work with it the way I’m going to show you, and then in the next lesson, we’ll talk about the new way to work with text, and the immediate differences you’ll notice.
The “old” (but still usable) way that text was added to your timelines was as an effect. The biggest problem with this method, is that you are then limited to having the title be only as long as the clip that it’s attached to, and that is true, that was a big limitation of the old text effect, but that doesn’t mean that there wasn’t a workaround for it, and it’s one that I use all the time, so let’s check it out. The first thing I will do when I want to start adding titles to my work, is to create a new Composite Shot. Now, what’s important to keep in mind about this Composite shot is that it’s not going to contain anything. We’re going to make it 30 seconds long (for argument sake), but keep in mind that if you know that you are always going to want your titles to be 6 seconds, by all means, make your Composite shot 6 seconds long. The reason that I like to go with longer composite shots is that at some point you, or a producer/director will want a title up there a little longer, and it’s easier having it longer originally, that having to make adjustments after the fact. Once you’ve created your Composite shot, and added it to your timeline, it will look a little like what you see below.
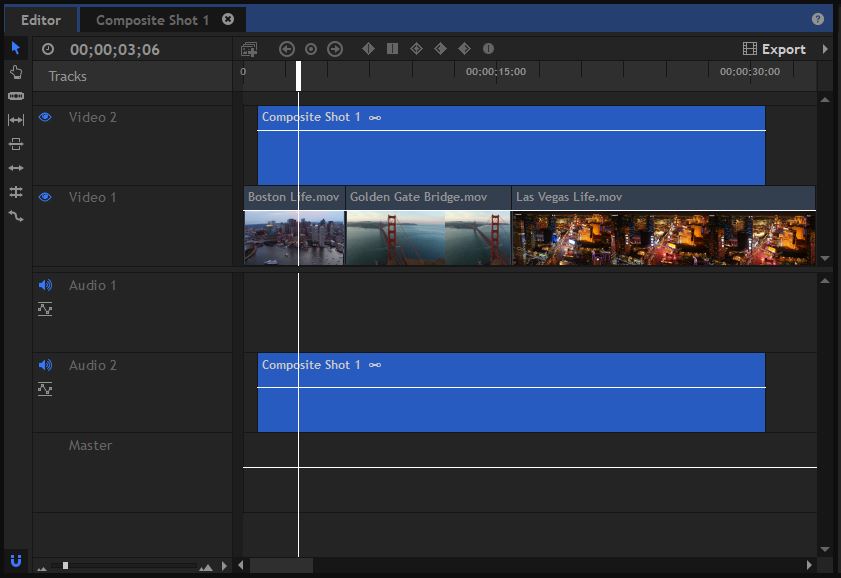
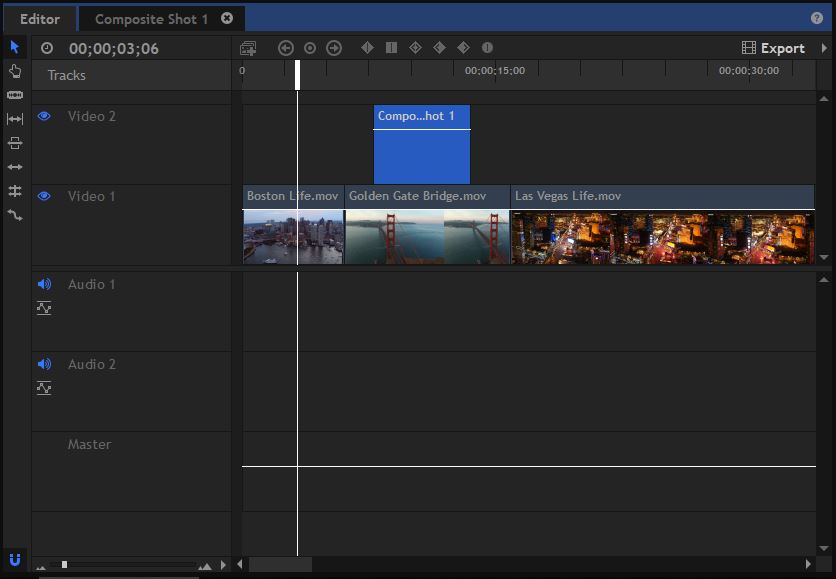
Now, as you can see, both video and audio have been added to your timeline. Since we don’t need the audio, you can simply right click and select “Unlink”, and delete the audio, and you can then adjust the in/out points to give you a duration of roughly 6 seconds long.
Now, let’s head to the Effects window, type in “Text” as the effect we’re looking for, and apply it to our Composite Shot. You’ll now see a pretty small “Text” wordmark in the middle of the frame.
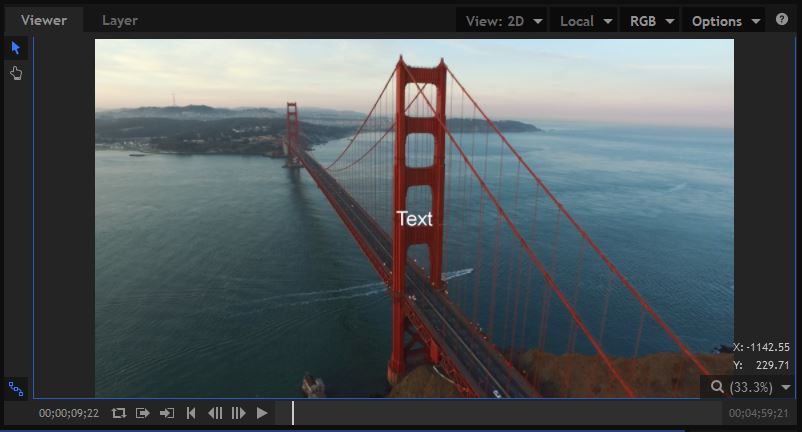
Now that we’ve got our text in our timeline, let’s head back over to the Controls window, where I can show you how you’re going to get in and make adjustments to this text.
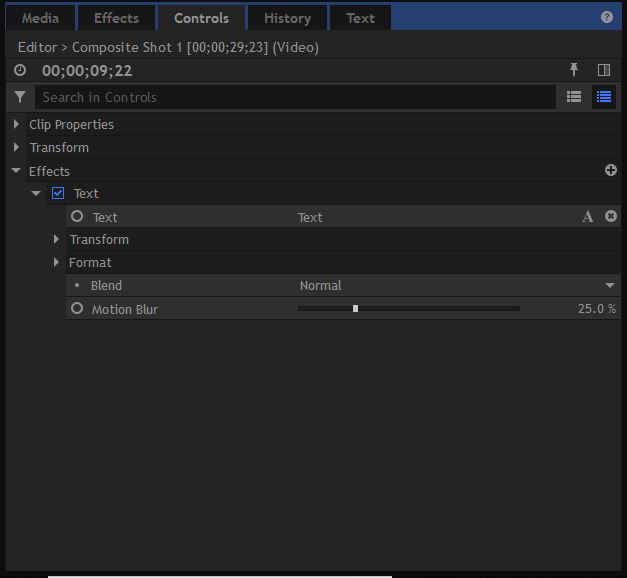
The main thing you’re going to need to know right off the bat, is how to change the text you have on the screen, because “Text” is probably not what we’re going for. If you take a look at the first parameter, “Text”, you’ll notice a little “A” to the right side of the controls window.
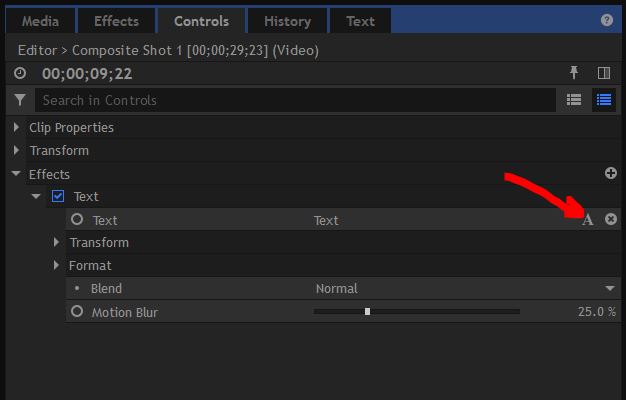
Simply hit it, and you’ll get a pop up window to appear that will let you change the text you have on screen.
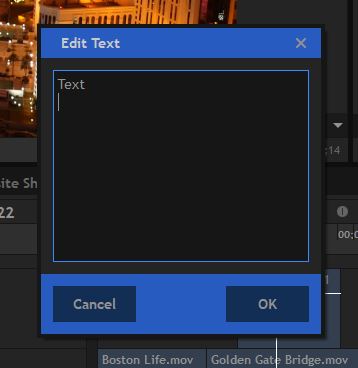
Now you can enter whatever text you want, click OK, and you can then get in and adjust any of the other parameters in the “Format” section like Font Size, Style, Alignment and Color. Keep in mind, though, that since we did not apply this text effect to an actual layer, your Blend/Transfer Modes will not work, as technically these layers are over transparency. Once you have the text looking the way you want, we can now get in and add even more style effects to our text. Let’s use a glow as an example. Simply head back to your Effects window, and type in “Glow”. We’ll just go with the standard HitFilm Pro Glow. Drag the effect to the text “Composite Shot” layer in your timeline, now you’ll see it appear after the Text effect, and you can now create a stylistic glow to go on top of your footage.
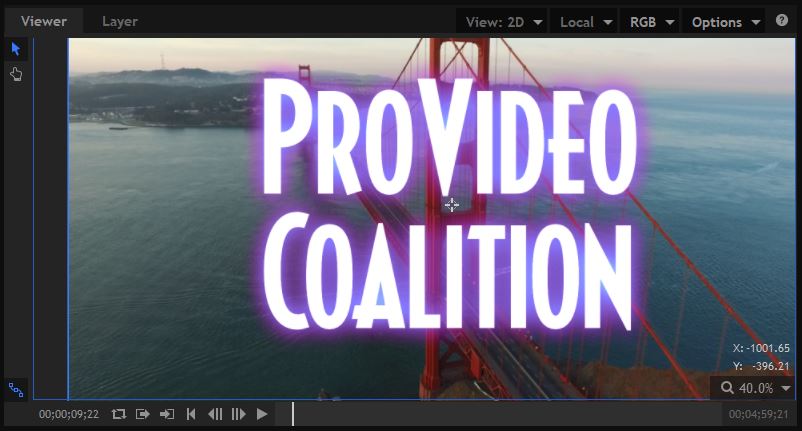
One last thing I’ll say about the old text effect is that there are some very quirky things going on here. For example. When you have two lines of text, and you want to make an adjustment to the spacing between lines, you would think you’re adjusting “Leading”, but you’re actually adjusting “Line Spacing”, which by default is set to 100%, with no way to pull the slider bar lower than 100%. You can manually enter a value lower than 100%, but not adjust the slide bar. Very odd.
In our next lesson, we’ll move on and take a look at how to work with text the “new” way, via a layer element, and you’ll see why this method hits a homerun in some ways, but is one step forward, and two steps backwards in others.
FTC Disclosure
I have received no compensation from HitFilm for the production of these tutorials. Opinions in this article, whether you agree with them or not, are my own!

Filmtools
Filmmakers go-to destination for pre-production, production & post production equipment!
Shop Now