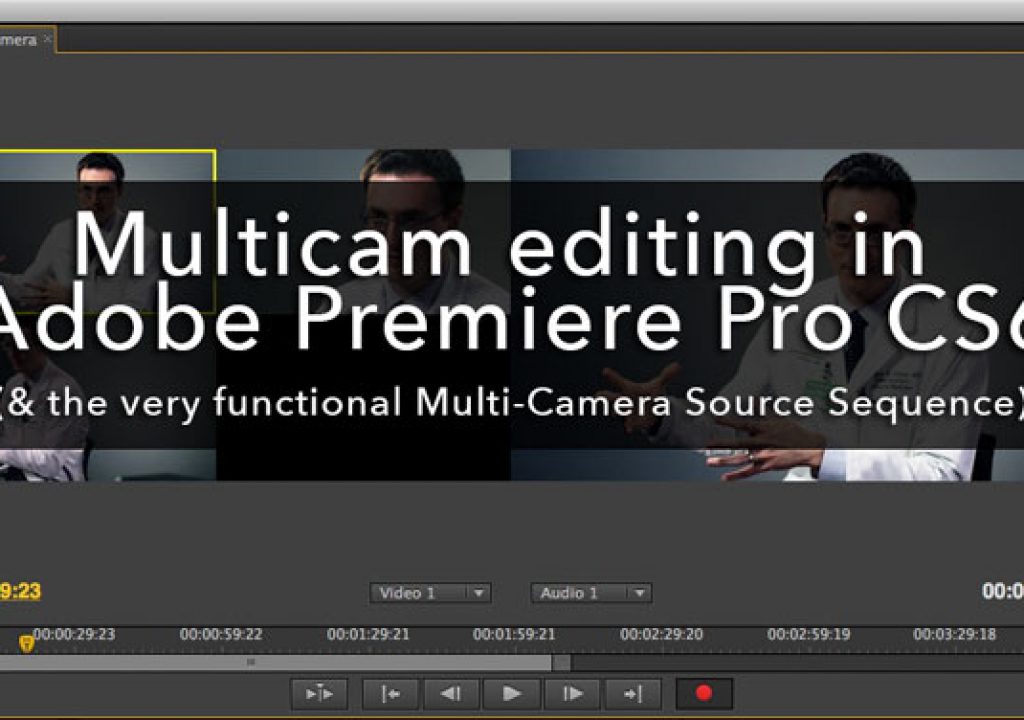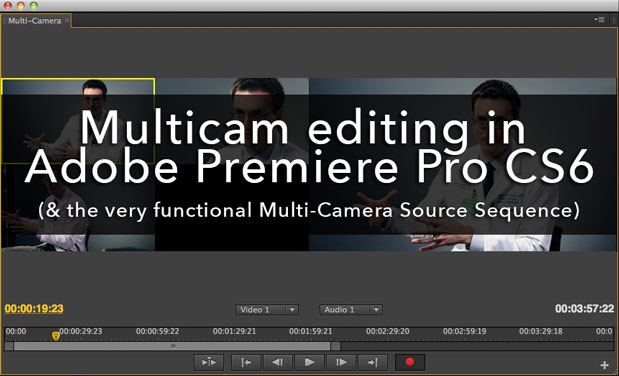
I’ll be the first to admit that while multi-camera editing tools have been available in Adobe Premiere Pro for quite a while I hadn’t ever touched them until Premiere Pro CS6. I think that may be true for a lot of editors when it comes to a lot of features of Premiere Pro in general. While I had used Premiere Pro on sort of a semi-regular basis since CS4, CS6 has become a regular tool. I finally gave Premiere Pro’s multicam a shot recently … and it’s very nice. It works well, is quite powerful when it comes to setup and adjustment of multicam angles but it’s missing a couple of important features that some of its competitors have.
{C}
While there’s probably many different ways to use multicam tools no matter which NLE you’re working in one of my determining factors when it comes to how usable (or unusable) an NLE’s multicam is boils down to how easy (or difficult) it is to set up a multicam group and deal with that group once it is created. Final Cut Pro X, for example, is a real joy when it comes to multicam setup as its innovative Angle Editor is simple and powerful. Final Cut Pro 7’s multicam worked but was a total kluge when it came to adding new angles or slipping sync within a group even though it, in theory, had those capabilities. Once you set up an Avid Media Composer multicam group it edits like butter but don’t try to really manipulate that multicam group once it has been created because you can’t.
Enter Premiere Pro CS6 and its idea that when setting up a job for multicam editing it’s all based around a Multi-Camera Source Sequence. I really like this approach as this multicam sequence gives the editor a place to always go back to and get an overview of exactly what they have in a multicam clip. You can think of a PPro multicam sequence kind of like a sync map because that’s really what it is only you’ll see it and use it after a multicam clip is created (though you still might want to create a sync map before creating a mulicam sequence just to get that top down overview of all your angles and how they relate to reach other). If Premiere Pro’s multicam sequence sounds a lot like FCPX’s Angle Editor when we’re done with this discussion then you’re thinking the same thing that I did.
First establish the syncing point
When it comes time to do a multicam edit in any NLE the first thing you have to do is establish common sync points amongst all your clips. This can be done in any number of ways but in a perfect world all angles would have jam synced timecode but that’s a rarity these days. Like other NLEs PPro offers a choice for exactly how to establish sync between multiple clips. Once you’ve done that, say using IN points as the sync point, you select all the clips, right+click with them selected and choose Create Multi-camera Source Sequence:
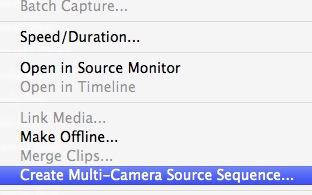
Then you’ll be presented with the question of exactly how to sync up the clips.
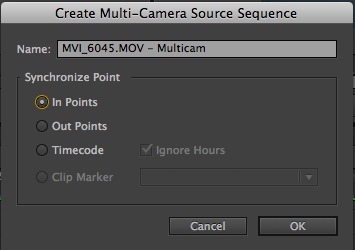
Choose your method of syncing when creating a multicam sequence.
Since an incredibly common method of establishing sync these days is to use a camera’s scratch audio it’s worth noting that PluralEyes works with PPro CS6.
Once a new multicam sequence has been created there’s, surprise surprise, a new sequence in the bin albeit with a slight different icon from all the regular sequences in the project:
![]()
The multicam sequence on the left is distinguished by flush look of the little clip icons.
That different looking sequence icon is important (it might be nice if the little clips in the icon were a totally different color) as it behaves very differently when double-clicked or tossed into another timeline.
Loading the multicam sequence
Once that multicam sequence is created a double+click loads the multicam source sequence into the Source monitor instead of opening a timeline like you might expect. That’s fine because what you most likely want to do at this point is edit that sequence into the timeline and go to work. You can edit a Multicamera Source Sequence from the Source monitor just like any other clip.
You can also drag a multicam sequence into a timeline and get a multicam clip as well. That green clip, along with the [MC] bracket, means it’s a multicam clip.

With a multicam clip in the timeline you’re now ready for Premiere Pro’s multicam editing.
How does a multicam clip in the timeline differ from any other clip or nested sequence in the timeline? That’s where the Multicam Monitor comes in.
Multicam Monitor
Premiere Pro’s Multi-camera Monitor is a separate tool and separate window that is the place where you can do just what the name says: monitor a multicam clip in the timeline. It’s also the place where you can do a live multicam switch of the angles. When the Mulitcam Monitor is open and the playhead hits a multicam clip you’ll see a familiar multicam split (that is familiar if you’ve ever edited multicam before) appear. Any time you see one of those in an NLE chances are you can do a live multicam switching of angles and Premiere Pro is no exception.
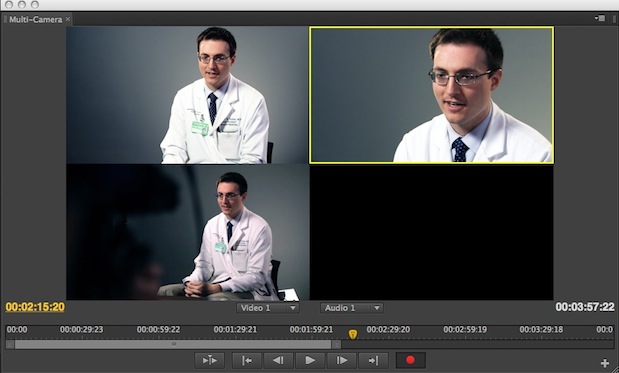
The PPro Multicam Monitor is a dedicated window to play the clip and do live camera switching.
In PPro that angle switching takes place in the Multi-Camera Monitor. There’s a play button in the Multi-Camera Monitor so to engage in live switching you have to initiate playback from there. There’s also a red Record On/Off Toggle that has to be toggled on to record the switching but as long as you are playing back in the Multi-Camera Monitor window you can make a switch and the record toggle will come on.
There’s a full compliment of keyboard shortcuts that can be used in the Multi-Camera Monitor Panel so be sure and check the keyboard shortcuts if you want to learn those.
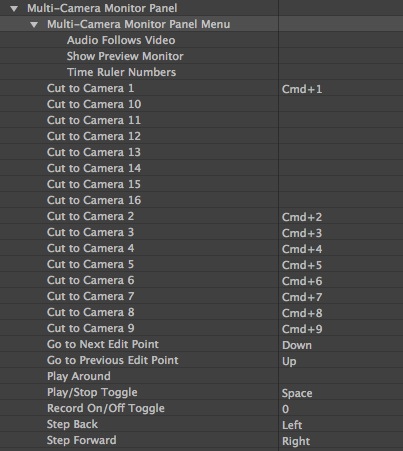
The multicam monitor is an all right place to work and functionally it does what it’s supposed to do but it is one more window to open in what can be an already somewhat busy PPro interface. I would prefer to have the option to see and switch the multicam split right in the Source monitor. I suppose one advantage of the stand alone multicam monitor is that it can be moved and resized independent of any window so that is nice. There’s also a setting to Show Preview Monitor (toggled in the flyout menu in the upper right of the window) that adds a full frame in the Multi-Camera Monitor so you don’t even have to look at the Program window when doing a switch.
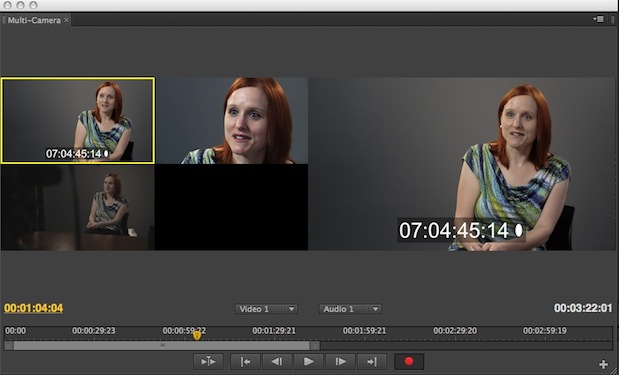
Adding the preview option to the Multicam Monitor is another way to make and monitor the camera switch all in one window.
You can pretty much work with as many angles as you can have video tracks (instead of the limitation of 4 angles from previous versions) so if you have a ton of them viewing the split in an independent, resizable window could be very helpful. On the other hand, I’m most often dealing with 3 or 4 angles for interviews so that’s where it would be nice to see and switch the split in the Source.
Thankfully the Multi-Camera Monitor window can benefit from PPro’s full screen tilde (`) key feature, meaning that at any point in any window in PPro you can hit the tilde key and take that single window full screen. It’s a very handy thing. When you do that in the Multi-Camera Monitor it makes the camera switching focus front and center and that’s a good way to work. Note that the Multi-Camera Monitor has to be docked into a panel with other windows for the full screen tilde to work. If it’s just floating by itself above all the docked window panels, where it was the first time I opened it, the full screen tilde won’t work.
Using the Multicam Monitor isn’t the only way to switch angles in the timeline though. Once you have a multicam clip on the timeline a right + click will reveal a new submenu option where you can change an angle as well.
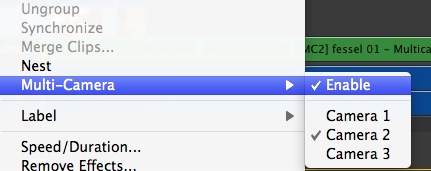
Angles can be changed via a submenu right on clips in timeline. This menu is also available at the bottom of the Clip menu.
But there’s one big thing that’s missing when it comes to switching angles in the PPro timeline … more on that in a bit.
When it comes to audio in a multicam clips PPro offers an Audio Follows Video toggle in the Multi-Camera Monitor window. This will be familiar if you’re coming from other NLEs because most offer something similar. When that option is enabled switching angles in the Multi-Camera Monitor will switch both the audio and the video. I rarely ever use this as I always use one audio track from the main camera or an external audio recorder. I can’t remember the last time I needed to do a lot of switching of audio angles.
And the best thing about Premiere Pro CS6 multicam
IMHO, the overall best thing about multicam in CS6 comes from the fact that you create this Multi-Camera Source Sequence as the setup before cutting and how that sequence remains the source that the multicam clips in the timeline are always pointing back to. With this method of creating the multicam sequence first you can open that multicam multicam sequence at any time, actually adjust anything in the multicam sequence and have those changes be reflected and ripple throughout an entire edit.
I’ll illustrate how I used this recently in an edit. I had a number of three camera interviews with timecode notes to create a paper edit. It was a significant enough edit that I wanted to use multicam but the problem I ran into was that once I had created the multicam clips there was no way to see source timecode on the original clips once the multicam clip was in the edit. Looking at the Info tab didn’t work as it (unfortunately) doesn’t show source code on multicam clips. I hope Adobe engineers will remedy this in the future because it’s often very important to see source timecode on multicam angles.
I solved this by first opening the multicam sequence in the timeline:

Opening a multicam sequence in the timeline for editing is a right+click operation as a double click on a multicam sequence will load it into the Source monitor.
There I placed a Timecode effect on the clip on my main camera angle in video track 1 and disabled the other two angles as I only wanted to see the clip with BITC. I then did the paper edit with only the one angle visible with BITC. Once I had the edit in my main timeline I was able to open the Multi-Camera Source Sequence back up, disable the timecode effect on V1, turn the other angles back on and begin the multicam switch part of the edit.
That was a case of using PPro’s mulitcam as a workaround to overcome a limitation of not being able to see the source timecode but it’s also very useful for many other tasks as well.
Take color correction. That was the last step of this edit but instead of color correcting right on the main edit timeline I was able to open the Multi-Camera Source Sequence of each of the three interviews and color correct (it was an important task since one of the three angles was 5D vs. F3) in the multicam sequence. That color correction was then automatically reflected in main edit sequences. So instead of having to apply the correction to each individual shot over and over I had to apply each correction once. It was a huge timesaver.
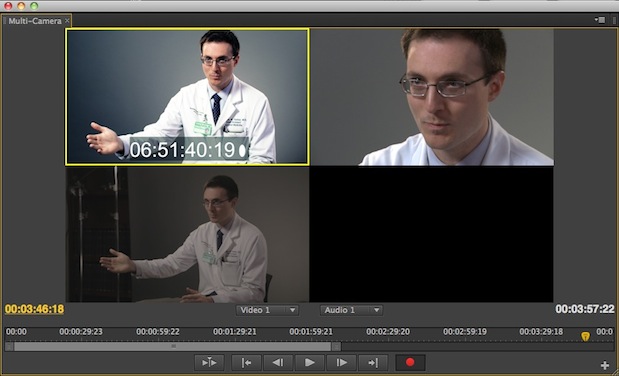
Above is one of the interviews with both timecode and a color correction on angle one while the other two angles are “raw.”
Taking this technique one step further, you can do many different kinds of things within a multicam sequence besides just adding effects and color correction. Moving clips around in a multicam sequence will be reflected in an edit timeline so it’s very useful for things like slipping sync or adding a new angle after you’ve begun editing. You can also add footage to an existing angle as I had to do when part of one of the 5D interview angles was missing (the camera op had stopped and started the camera during the interview). I had already edited half the interview so it was as simple as opening the multicam sequence for that interview and adding and syncing the last piece of the 5D angle. It was then right there in the main edit sequence.
You can see how this works with the number of angles in a Multi-Camera Source Sequence being the number of angles in a multicam clip in the timeline.
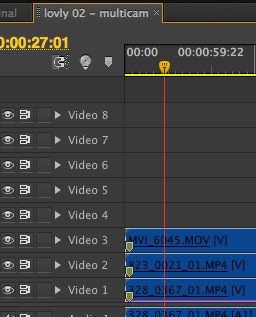
In this example this Multi-Camera Source Sequence has only 3 active angle but the timeline has 8 video tracks.
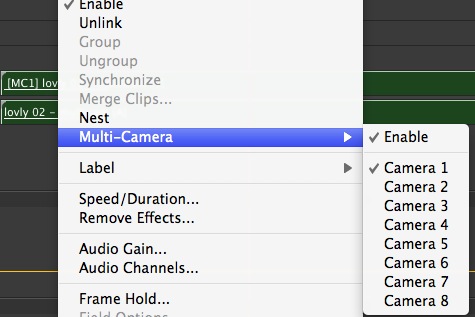
Looking at that multicam clip in the timeline you can see it has 8 angles available for switching even though there is only media on the first 3 video tracks.
If I was to remove those 5 empty video tracks from the Multi-Camera Source Sequence then they wouldn’t be available in the edit timeline anymore either.
As I said eariler, if this concept of the Multi-Camera Source Sequence in Premiere Pro sounds a lot like Final Cut Pro X’s Angle Editor then you’re thinking the same thing that I was as they can function in a very similar way. I had never edited multicam in versions of PPro prior to CS6 but while the setup did involve creating a sequence with synced multicam angles the setup seemed more cumbersome that CS6. PPro’s idea of beginning a multicam edit with some type of multicam synced sequence has been around longer than FCPX’s Angle Editor so Apple might have taken inspiration from it. The FCPX Angle Editor works better overall (as does multicam in general in FCPX) as there’s some dedicated tools for monitoring angles, checking sync and rearranging of angles.
And about that missing camera switching feature
UPDATE 7-2017: Adobe added features that makes the discussion below null and void. Check out Adobe Premiere Pro: The Add Edit – Step Through technique for multicam editing for more details.
For me and the way I edit multicam the single biggest missing features in Premiere Pro’s multicam is the ability to quickly and easily step through the different angles in the timeline via a keyboard shortcut. It seems like a no-brainer that this would be possible by a keyboard shortcut but I can’t find one. Sure you can right + click on a clip to access all the angles via a submenu but that’s wildly inefficient to do over and over and over. There are times when you just don’t want to open a separate monitor window and/or look at all the angles at once so just changing those angles in the timeline via the keyboard is a super fast way to do just that. And this is a deal breaker for music videos (at least it’s a deal breaker in the way I edit) as you might have 20, 40, 60 different angles in a clip and that’s really the only way to efficiently move through them.
All of Premiere Pro’s competitors have this feature.
![]()
Avid Media Composer’s group switching buttons are found in the Command Palette.
![]()
I mapped the switch angles buttons to the keypad in FCP7.

In FCPX you can map angle switching to the keyboard as well in the Command Editor.
I really, really, really hope the Premiere Pro engineers will add this functionality in a future update to PPro as it is so close. Hopefully it wouldn’t be that hard.
And no way to commit or collapse those multicam edits
One other thing that is missing from Premiere Pro CS6’s multicam editing is a way to commit multicam edits (as Avid Media Composer calls it) or collapse multiclips (as Final Cut Pro 7 calls it) when you’re done with an edit. This function basically replaces all group clips (as Avid calls them) or multiclips (as FCP7 calls them) with a normal, single clip in the timeline. This can be very important if you’re sending out AAFs or XMLs to another finishing system as multicam-type clips might cause some problems on conform.
It looks like PPro CS6 has something similar because if you right+click on a multicam clip and look at the Multi-Camera submenu there’s an option to Enable:

When you toggle that Enable check mark and disable the multicam clip it doesn’t “commit” that clip to the timeline but rather it seems to default to whatever clip is on the top most video layer in the Multi-Camera Source Sequence timeline. That doesn’t make a lot of sense to me but I think that’s a holdover from the older PPro versions when you had to edit a sequence into a sequence and then enable Multi-Camera to make it work. If Adobe wants to make Premiere Pro play nice with conform and finishing applications (and I think they do) then some way to collapse/commit multi-camera edits to a timeline with one swift click will help.
UPDATE 7-2017: Adobe did add the ability to flatten mulitcam clips. This Youtuber shows it:
https://youtu.be/c6eEftRy19E
Overall an A to Premiere Pro CS6 for multicam
I have to say that after I finally used multicam in PPro CS6 I really like the way it works even with a few missing features. As I said above it’s worth noting that multicam isn’t NEW to version CS6 as Premiere Pro has had multicam in other versions … I just hadn’t used it. And I’m willing to bet others haven’t used it either especially since CS6 is seeing some editors use Premiere Pro for the first time.
For overall ease of setup and changing angle attributes once a multicam sequence is set up then Premiere Pro CS6 deserves the grade of A. It’s really in a good position as it works quite well so there’s only a couple of things to fix to make Premiere Pro’s multicam editing functionality darn near perfect.

Filmtools
Filmmakers go-to destination for pre-production, production & post production equipment!
Shop Now